
Simplifying Model Context Protocol (MCP) Server Development with Aspire dotnet aspire mcp mcp-server

TL;DR
Use the mcp-server-hybrid template to be able to easily switch between stdio and sse transports.
Source code: https://github.com/NikiforovAll/mcp-template-dotnet
| Package | Version |
|---|---|
Nall.ModelContextProtocol.Template |
 |
Nall.ModelContextProtocol.Inspector.Aspire.Hosting |
 |
Create from Template
Previously, I’ve shared with you the blog post - Simplifying Model Context Protocol (MCP) Server Development with Aspire. In this post we explored two ways to run the MCP server using Aspire.
🎯 In reality, depending on the context, you may want to run the MCP server in different ways. For example, you may want to run the MCP server in sse mode for debugging/development purposes, but in stdio mode for production.
In this post, I will show you how to use a simple template to create an MCP server that can be run in both modes.
📦 As in my previous post, let’s install Nall.ModelContextProtocol.Aspire.Template package:
dotnet new install Nall.ModelContextProtocol.Template
# These templates matched your input: 'mcp'

# Template Name      Short Name         Language  Tags
# -----------------  -----------------  --------  -------------
# MCP Server         mcp-server         [C#]      dotnet/ai/mcp
# MCP Server SSE     mcp-server-sse     [C#]      dotnet/ai/mcp
# MCP Server Hybrid  mcp-server-hybrid  [C#]      dotnet/ai/mcp
➕Create an mcp-server-hybrid project:
dotnet new mcp-server-hybrid -o MyAwesomeMCPServer -n MyAwesomeMCPServer
Now we can run it in two different modes:
In SSE mode:
dotnet run
# info: Microsoft.Hosting.Lifetime[14]
#       Now listening on: http://localhost:3001
# info: Microsoft.Hosting.Lifetime[0]
#       Application started. Press Ctrl+C to shut down.
# info: Microsoft.Hosting.Lifetime[0]
#       Hosting environment: Development
# info: Microsoft.Hosting.Lifetime[0]
#       Content root path: ${HOME}/MyAwesomeMCPServer
# info: Microsoft.Hosting.Lifetime[0]
Start the MCP Inpsector and configure it to listen on the default address: “http://localhost:3001/sse”.
npx @modelcontextprotocol/inspector
In Stdio mode:
npx @modelcontextprotocol/inspector dotnet run -v q -- --stdio
# ⚙️ Proxy server listening on port 6277
# 🔍 MCP Inspector is up and running at http://127.0.0.1:6274 🚀
# New SSE connection
# Query parameters: {
#   transportType: 'stdio',
#   command: 'dotnet',
#   args: 'run -v q --stdio'
# }
# Stdio transport: command=C:\Program Files\dotnet\dotnet.exe, args=run,-v,q,--stdio
SSE vs Stdio
The benefit of the SSE mode is that you can run the MCP server with a debugger attached and/or see the logs directly. The Stdio mode is slightly more complex, as it relies on the MCP Client (e.g., MCP Inspector) to start the server, and it disables logging on the MCP server to maintain compatibility with the MCP Client.
On the other hand, the Stdio Server’s lifetime is managed by the MCP Client. This makes it much easier to consume MCP servers in this mode because you typically don’t have to worry about the server’s lifetime. It is started by the MCP Client and stopped when the MCP Client is stopped.
Review the Code
Before you start developing your own MCPs using this template, let’s take a look at the code generated by the template. Here is a content of Program.cs:
var builder = WebApplication.CreateBuilder(args);
builder.WithMcpServer(args).WithToolsFromAssembly();

var app = builder.Build();
app.MapMcpServer(args);
app.Run();

[McpServerToolType]
public static class EchoTool
{
    [McpServerTool, Description("Echoes the message back to the client.")]
    public static string Echo(string message) => $"hello {message}";
}
💡 All “magic” happens in the McpServerExtensions.cs class. In the code below, we check if the --stdio argument is present. If it is, we configure the server to use the Stdio transport. Otherwise, we use the SSE transport. You don’t need to worry about how to switch between the two modes. The template does it for you.
public static IMcpServerBuilder WithMcpServer(this WebApplicationBuilder builder, string[] args)
{
    var isStdio = args.Contains("--stdio");

    if (isStdio)
    {
        builder.WebHost.UseUrls("http://*:0"); // random port

        // logs from stderr are shown in the inspector
        builder.Services.AddLogging(builder =>
            builder
                .AddConsole(consoleBuilder =>
                {
                    consoleBuilder.LogToStandardErrorThreshold = LogLevel.Trace;
                    consoleBuilder.FormatterName = "json";
                })
                .AddFilter(null, LogLevel.Warning)
        );
    }

    var mcpBuilder = isStdio
        ? builder.Services.AddMcpServer().WithStdioServerTransport()
        : builder.Services.AddMcpServer();

    return mcpBuilder;
}

public static WebApplication MapMcpServer(this WebApplication app, string[] args)
{
    var isSse = !args.Contains("--stdio");

    if (isSse)
    {
        app.MapMcp();
    }

    return app;
}
Aspire Integration
Down below I demonstrate how to run the MCP server using the Aspire hosting integration in two different modes simultaneously.
➕ Create AppHost:
dotnet new aspire-apphost -n AppHost -o AppHost
📦 Install Nall.ModelContextProtocol.Inspector.Aspire.Hosting package:
dotnet add ./Apphost package Nall.ModelContextProtocol.Inspector.Aspire.Hosting
🔗 Add project reference to AppHost:
dotnet add ./AppHost/AppHost.csproj reference ./MyAwesomeMCPServer/MyAwesomeMCPServer.csproj
Add the following code to Program.cs of the AppHost:
var builder = DistributedApplication.CreateBuilder(args);

var sse = builder.AddProject<Projects.MyAwesomeMCPServer>("server");
builder.AddMCPInspector("mcp-sse", serverPort: 9000, clientPort: 8080).WithSSE(sse);

builder
    .AddMCPInspector("mcp-stdio")
    .WithStdio<Projects.MyAwesomeMCPServer>();

builder.Build().Run();
Here is how the Aspire Dashboard looks like:
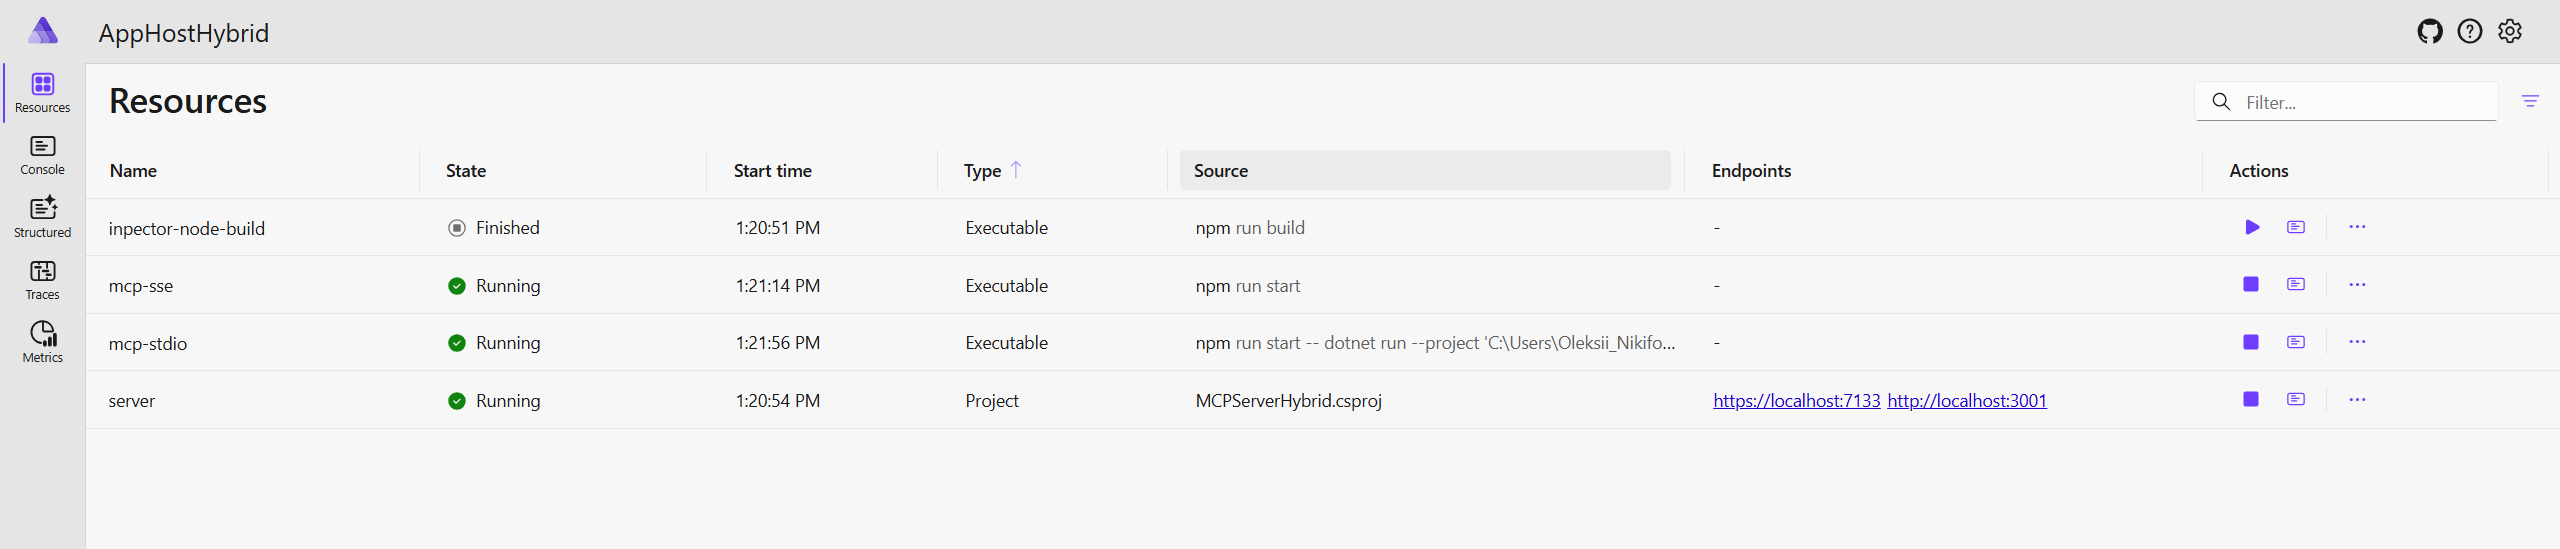
And it works like a charm!
Conclusion
🙌 I hope you found it helpful. If you have any questions, please feel free to reach out. If you’d like to support my work, a star on GitHub would be greatly appreciated! 🙏
References
