
- TL;DR
- Introduction to Keycloak
- Ideas behind Keycloak.AuthServices.Authentication
- Demo
- Bonus - Adding Authorization
- Summary
TL;DR
Learn how to use Keycloak in ASP.NET Core 6 by using Keycloak.AuthServices.Authentication.
Introduction to Keycloak
Keycloak - Open Source Identity and Access Management. Add authentication to applications and secure services with minimum effort. No need to deal with storing users or authenticating users. Keycloak provides user federation, strong authentication, user management, fine-grained authorization, and more.
Personally, I’m a big fan of Keycloak because it is a mature and full-fledged identity and access management system. It contains everything you might need for most of the scenarios. Contrary to IdentityServer it is easy to use out-of-the-box with no code required to get things going. If Azure Active Directory is not an option for some reason I definitely consider Keycloak as a viable open-source option that could be installed on-prem.
Features:
- Single-Sign On
- Identity Brokering and Social Login
- User Federation
- Admin Console
- Account Management Console
- Authorization Services
See: https://www.keycloak.org/
Ideas behind Keycloak.AuthServices.Authentication
Keycloak is OAuth2 + OpenID Connect compliant provider so it should be easy to use it. Although, it takes some time to may Keycloak concepts and configuration to ASP.NET Core Authentication configuration model. That is the way I’ve prepared a convenience library to speed up the integration process and make using Keycloak in .NET world more enjoyable.
Basically, we use AddKeycloakAuthentication to register and configure JwtBearerDefaults.AuthenticationScheme authentication scheme and provide KeycloakAuthenticationOptions.
/// <summary>
/// Adds keycloak authentication services.
/// </summary>
public static AuthenticationBuilder AddKeycloakAuthentication(
    this IServiceCollection services,
    KeycloakAuthenticationOptions keycloakOptions,
    Action<JwtBearerOptions>? configureOptions = default) {/*...*/}
The overall project structure looks like this:
var builder = WebApplication.CreateBuilder(args);

var services = builder.Services;
services.AddKeycloakAuthentication(authenticationOptions);

var app = builder.Build();
app.UseAuthentication();
app.UseAuthorization();

app.MapGet("/", (ClaimsPrincipal user) =>
{
    app.Logger.LogInformation(user.Identity.Name);
}).RequireAuthorization();

app.Run();
Configure KeycloakAuthenticationOptions
The are various ways to configure Keycloak authentication. Later, I will show you how to use Keycloak OIDC client adapter seamlessly.
1️⃣ Construct object
var authenticationOptions = new KeycloakAuthenticationOptions
{
    AuthServerUrl = "http://localhost:8088/",
    Realm = "Test",
    Resource = "test-client",
};

services.AddKeycloakAuthentication(authenticationOptions);
2️⃣ Read manually from configuration
var configuration = builder.Configuration;
var authenticationOptions = configuration
    .GetSection(KeycloakAuthenticationOptions.Section)
    .Get<KeycloakAuthenticationOptions>();

services.AddKeycloakAuthentication(authenticationOptions);
3️⃣ From configuration
var configuration = builder.Configuration;

services.AddKeycloakAuthentication(configuration, KeycloakAuthenticationOptions.Section);
// section is optional KeycloakAuthenticationOptions.Section = "Keycloak"
services.AddKeycloakAuthentication(configuration);
4️⃣ From the configuration file
keycloak.json file used by the Keycloak OIDC client adapter to configure clients. You may also want to tweak this file after you download it.
var configuration = builder.Configuration;
var host = builder.Host;
host.ConfigureKeycloakConfigurationSource("keycloak.json"); // file name is optional

services.AddKeycloakAuthentication(configuration);
Demo
Before we start integrating we need to run an instance of Keycloak on a dev machine.
docker run -p 8080:8080 \
    -e KEYCLOAK_ADMIN=admin -e KEYCLOAK_ADMIN_PASSWORD=admin \
    quay.io/keycloak/keycloak:19.0.1 start-dev
Please refer to https://www.keycloak.org/getting-started/getting-started-docker for more details.
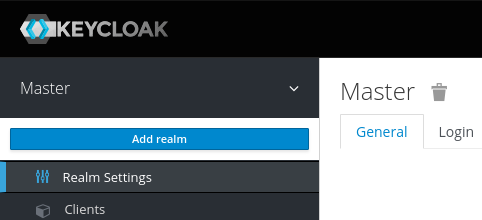
Let’s create our first realm.
- Open the Keycloak Admin Console
- Hover the mouse over the dropdown in the top-left corner where it says Master, then click on Add realm
- Fill in the form with the following values:
- Name: Test
- Click
Create
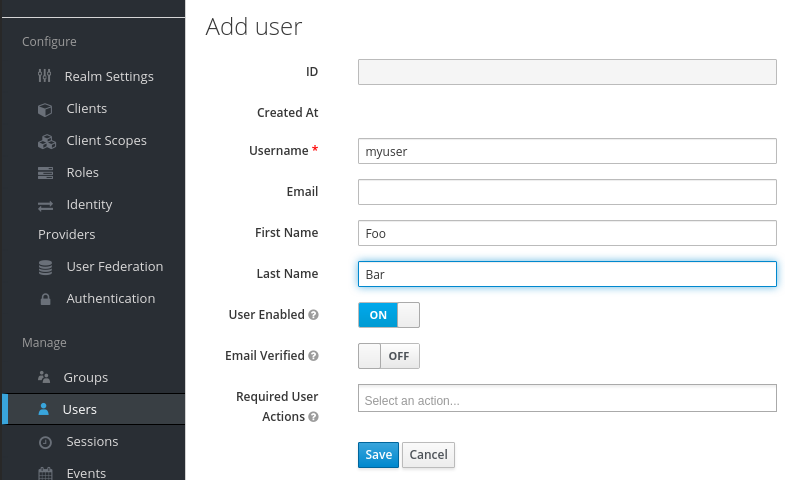
Create a user
Initially, there are no users in a new realm, so let’s create one:
- Open the Keycloak Admin Console
- Click
Users(left-hand menu) - Click
Add user(top-right corner of table) - Fill in the form with the following values:
- Username: test@test.com
- First Name: Your first name
- Last Name: Your last name
- Click
Save
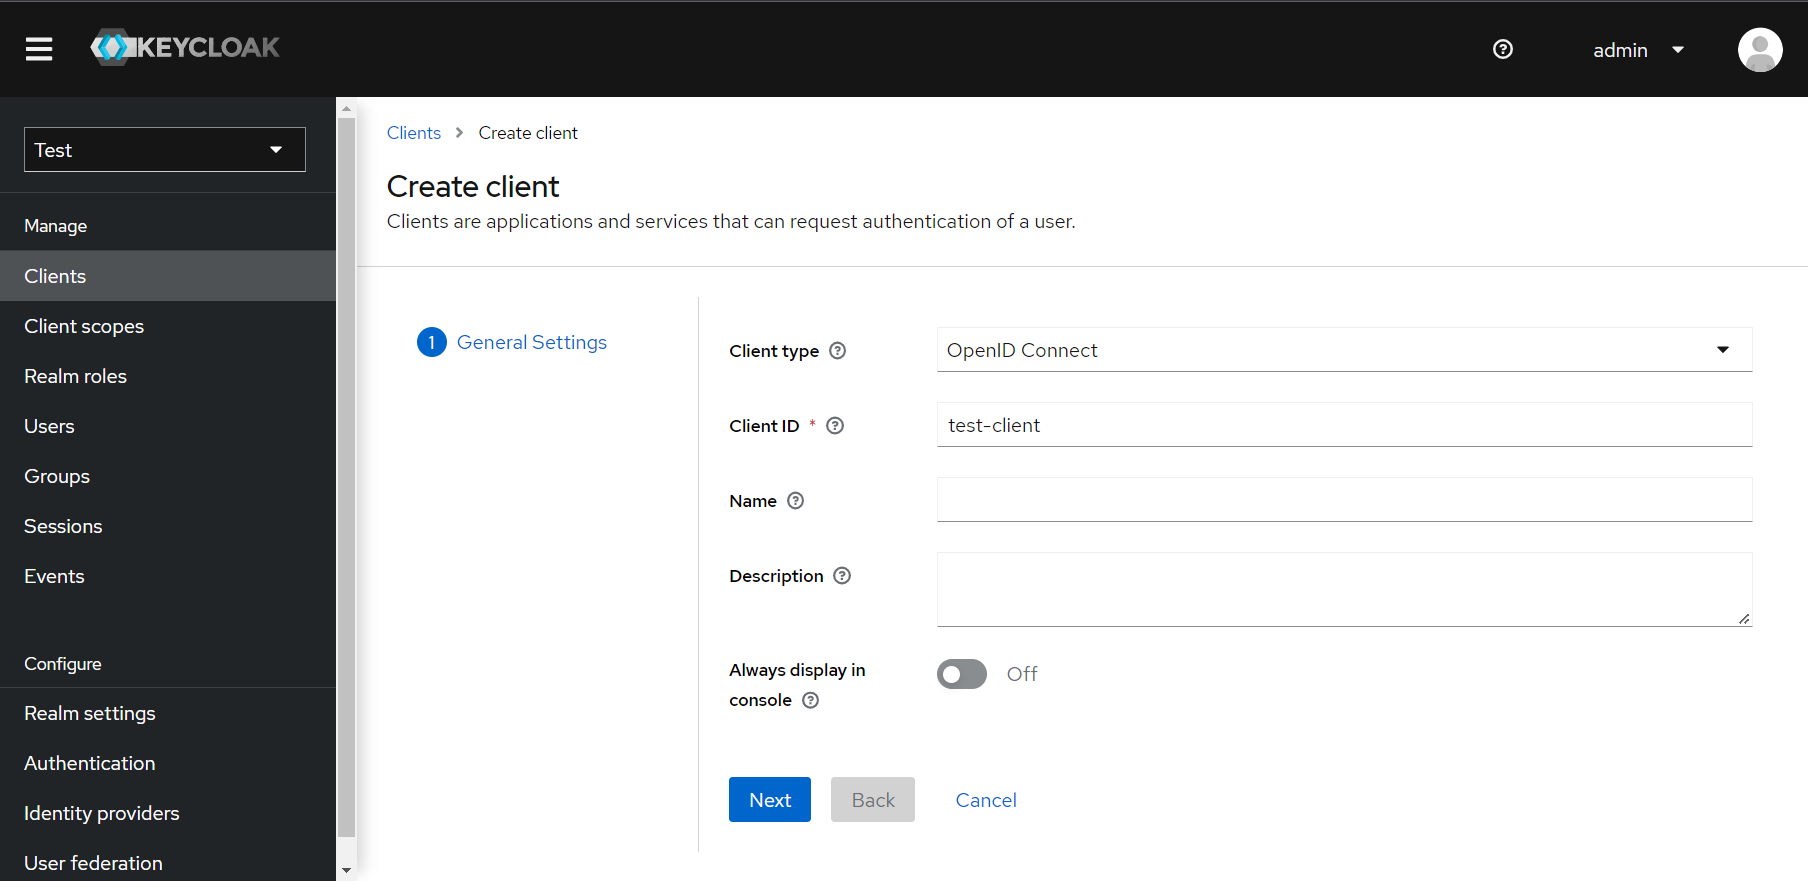
Let’s try to secure our first application. The first step is to register this application with your Keycloak instance:
- Open the Keycloak Admin Console
- Click
Clients(left-hand menu) - Fill in the form with the following values:
- Client Type: “OpenID Connect”
- Client Id: test-client
- Click
Save
As mentioned above, Keycloak has a concept of adaptor config. It allows us to copy essential configurations. Keycloak.AuthServices.Authentication is deliberately designed to streamline the installation process, so the KeycloakAuthenticationOptions mimics the structure of the adapter config.
Navigate the newly created client (top-right) and click “Action>Download adapter config”
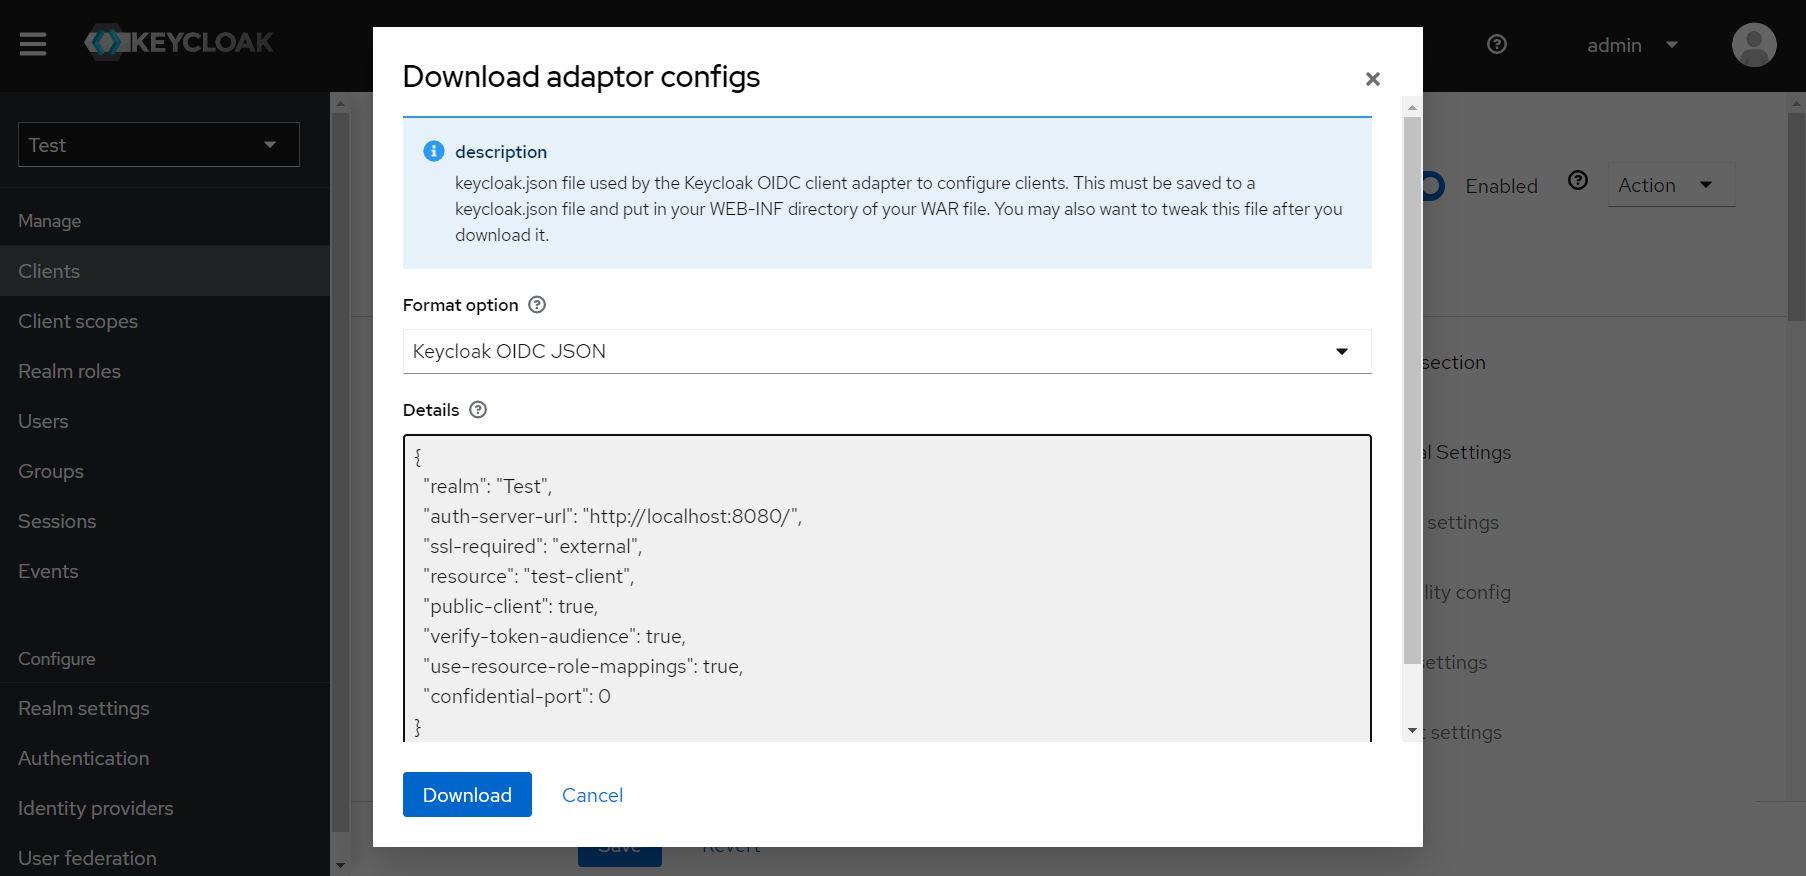
Here is what it looks like:
{
  "realm": "Test",
  "auth-server-url": "http://localhost:8080/",
  "ssl-required": "external",
  "resource": "test-client",
  "public-client": true,
  "verify-token-audience": true,
  "use-resource-role-mappings": true,
  "confidential-port": 0
}
💡 Generally, you want to use protocol mapper to configure the required audience (“resource” in the config above). To simplify the demo, we can just turn off Audience validation. Change “verify-token-audience”: false. See https://dbp-demo.tugraz.at/handbook/relay/keycloak/keycloak_audience/ and https://stackoverflow.com/a/53627747/8168625 for more details.
💡 Tokens should be exchanged based on HTTPS, but for the developer environment, you can use HTTP. Change “ssl-required”: “none”
Now, we can create keycloak.json or extend appsettings.json.
{
  "Logging": {
    "LogLevel": {
      "Default": "Information",
      "Microsoft.AspNetCore": "Warning"
    }
  },
  "Keycloak": {
    "realm": "Test",
    "auth-server-url": "http://localhost:8080/",
    "ssl-required": "none",
    "resource": "test-client",
    "verify-token-audience": false
    "confidential-port": 0
  }
}
To use provided configuration, simply register AddKeycloakAuthentication
var builder = WebApplication.CreateBuilder(args);

var services = builder.Services;
var configuration = builder.Configuration;
var host = builder.Host;

host.ConfigureLogger();
services.AddEndpointsApiExplorer().AddSwagger();

services.AddKeycloakAuthentication(configuration);
var app = builder.Build();

appv.UseSwagger().UseSwaggerUI();

app.UseAuthentication();
app.UseAuthorization();

app.MapGet("/", (ClaimsPrincipal user) =>
{
    app.Logger.LogInformation(user.Identity.Name);
}).RequireAuthorization();

app.Run();
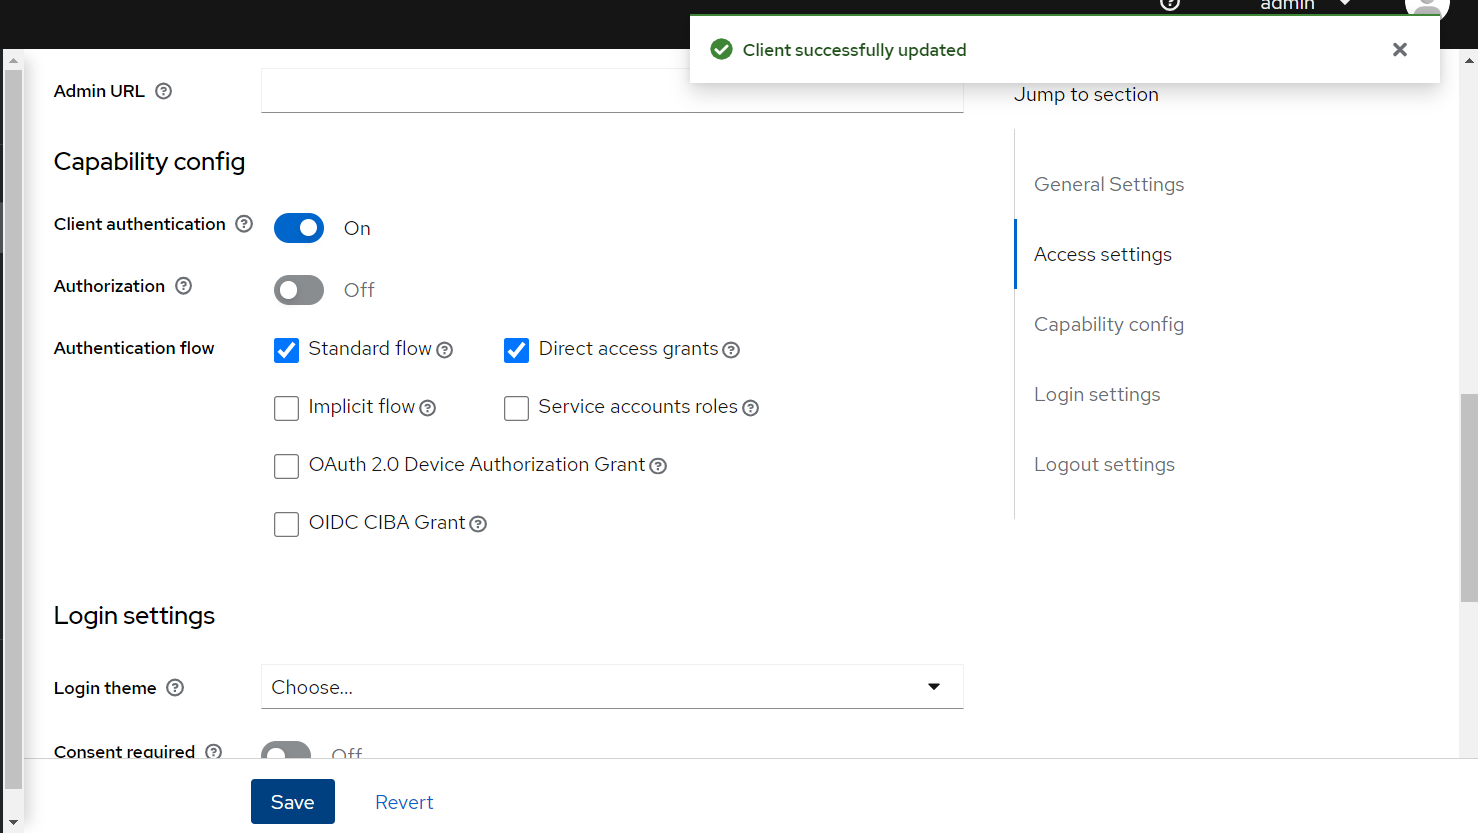
Now we need to obtain an access token and make a call via swagger-ui. There are various ways you can do it. In my case, I opened “test-client” and made it confidential, and enabled “Direct access grants”. This way we can use a username and password. Please make sure you understand how to configure OAuth 2.0 and OpenId Connect before moving to production. In my case, it is just easy to demonstrate.
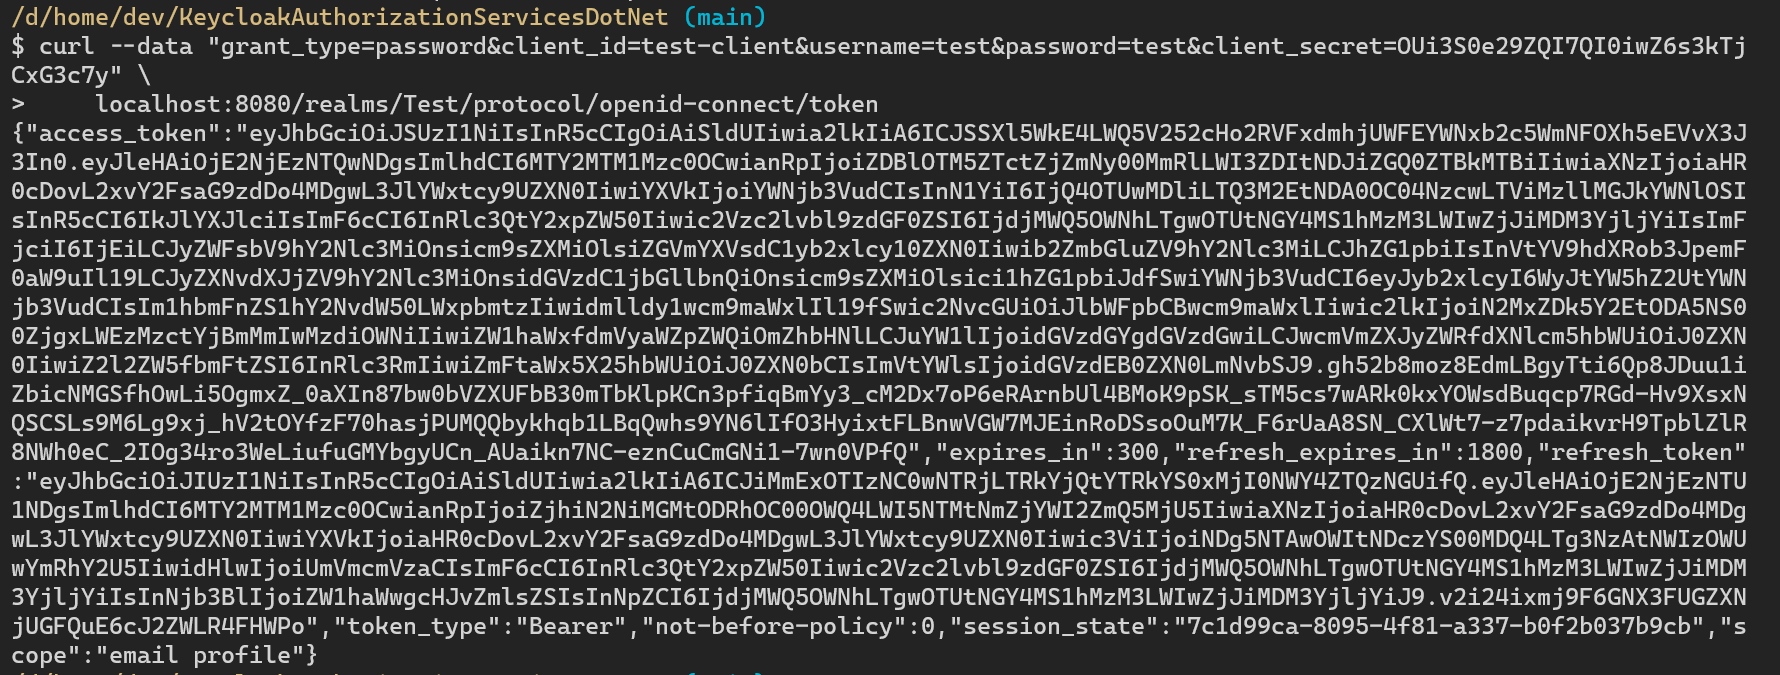
curl --data "grant_type=password&client_id=test-client&username=test&password=test&client_secret=Tgx4lvbyhho7oNFmiIupDRVA8ioQY7PW" \
    localhost:8080/realms/Test/protocol/openid-connect/token
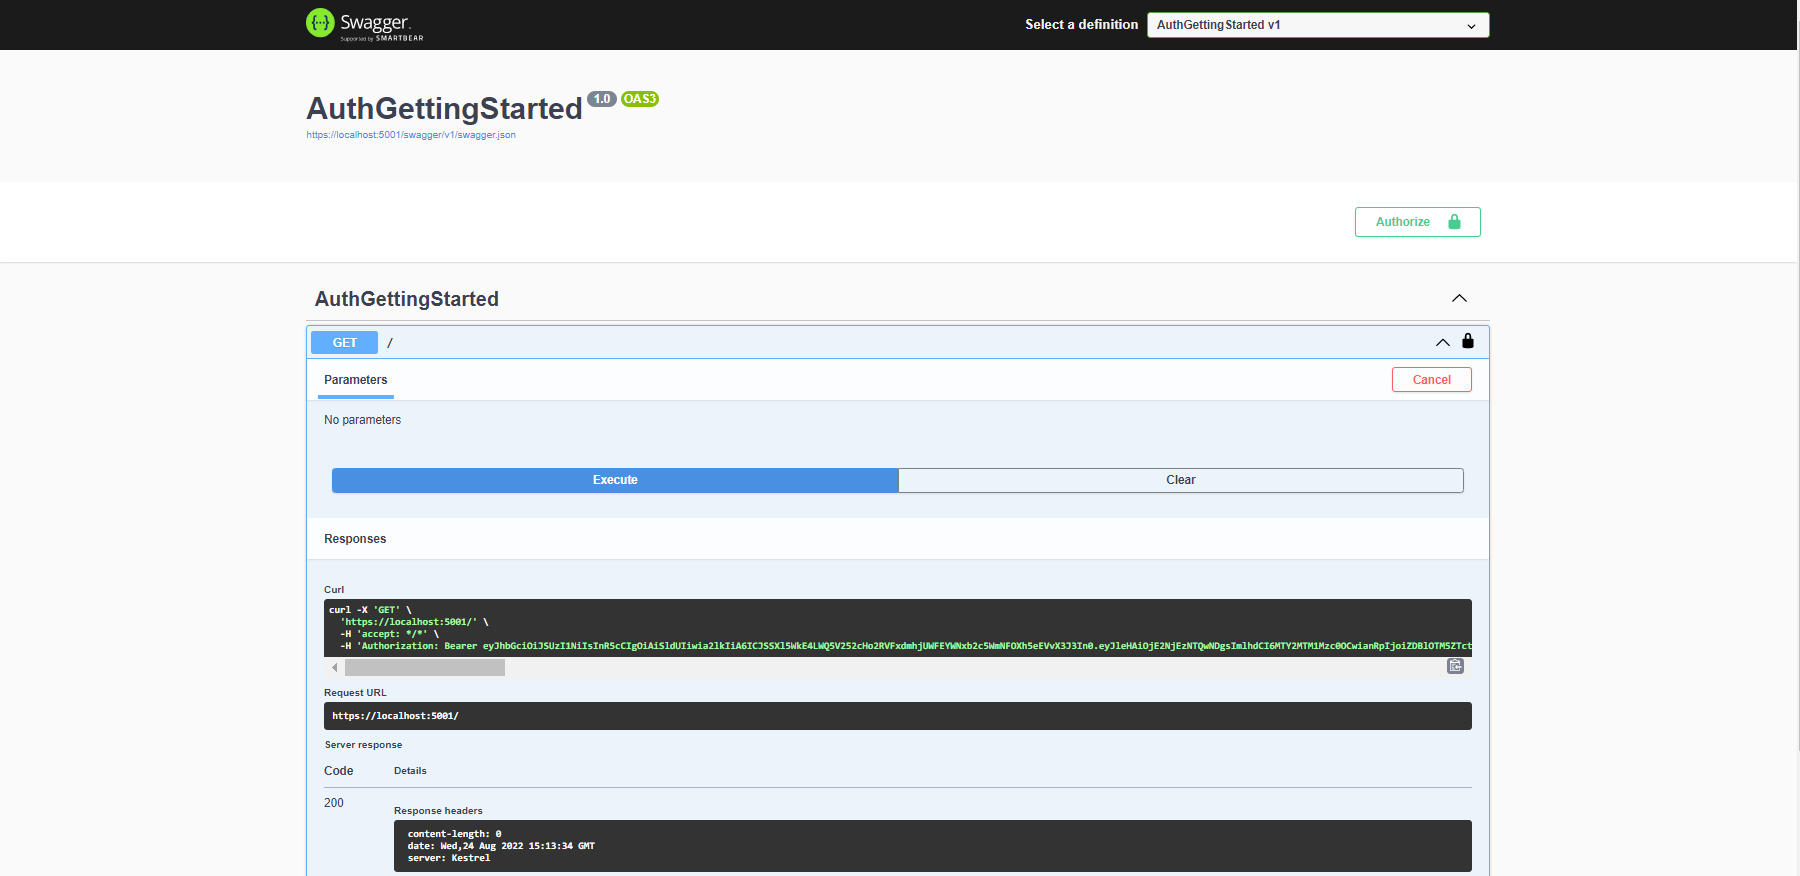
Now, we can navigate swagger https://localhost:5001/swagger and make an authentication request by providing an access token.
Bonus - Adding Authorization
Let’s see how we can use Keycloak.AuthServices.Authorization to build basic Keycloak-aware policies. See: AuthorizationPolicy
💡 Keycloak has a concept of roles. I added realm and resource roles behind the scenes. I suggest you figure it out on your own as an exercise 😛.
In the example below we require a user to have “admin” realm role and “r-admin” resource role by using RequireRealmRoles and RequireResourceRoles respectively. Note, that resource roles are automatically mapped to Microsoft.AspNetCore.Authorization roles so b.RequireResourceRoles("r-admin") is same as b.RequireRole("r-admin").
⚠ The resource from KeycloakAuthenticationOptions is used as an Audience and as the key for role mapping.
var builder = WebApplication.CreateBuilder(args);

var services = builder.Services;
var configuration = builder.Configuration;
var host = builder.Host;

host.ConfigureLogger();

services.AddEndpointsApiExplorer().AddSwagger();

services.AddKeycloakAuthentication(configuration);
services.AddAuthorization(o => o.AddPolicy("IsAdmin", b =>
{
    b.RequireRealmRoles("admin");
    b.RequireResourceRoles("r-admin"); // stands for "resource admin"
    // resource roles are mapped to ASP.NET Core Identity roles
    b.RequireRole("r-admin");
}));
services.AddKeycloakAuthorization(configuration);

var app = builder.Build();

app.UseSwagger().UseSwaggerUI();
app.UseAuthentication();
app.UseAuthorization();

app.MapGet("/", (ClaimsPrincipal user) =>
{
    app.Logger.LogInformation(user.Identity.Name);
}).RequireAuthorization("IsAdmin");

app.Run();
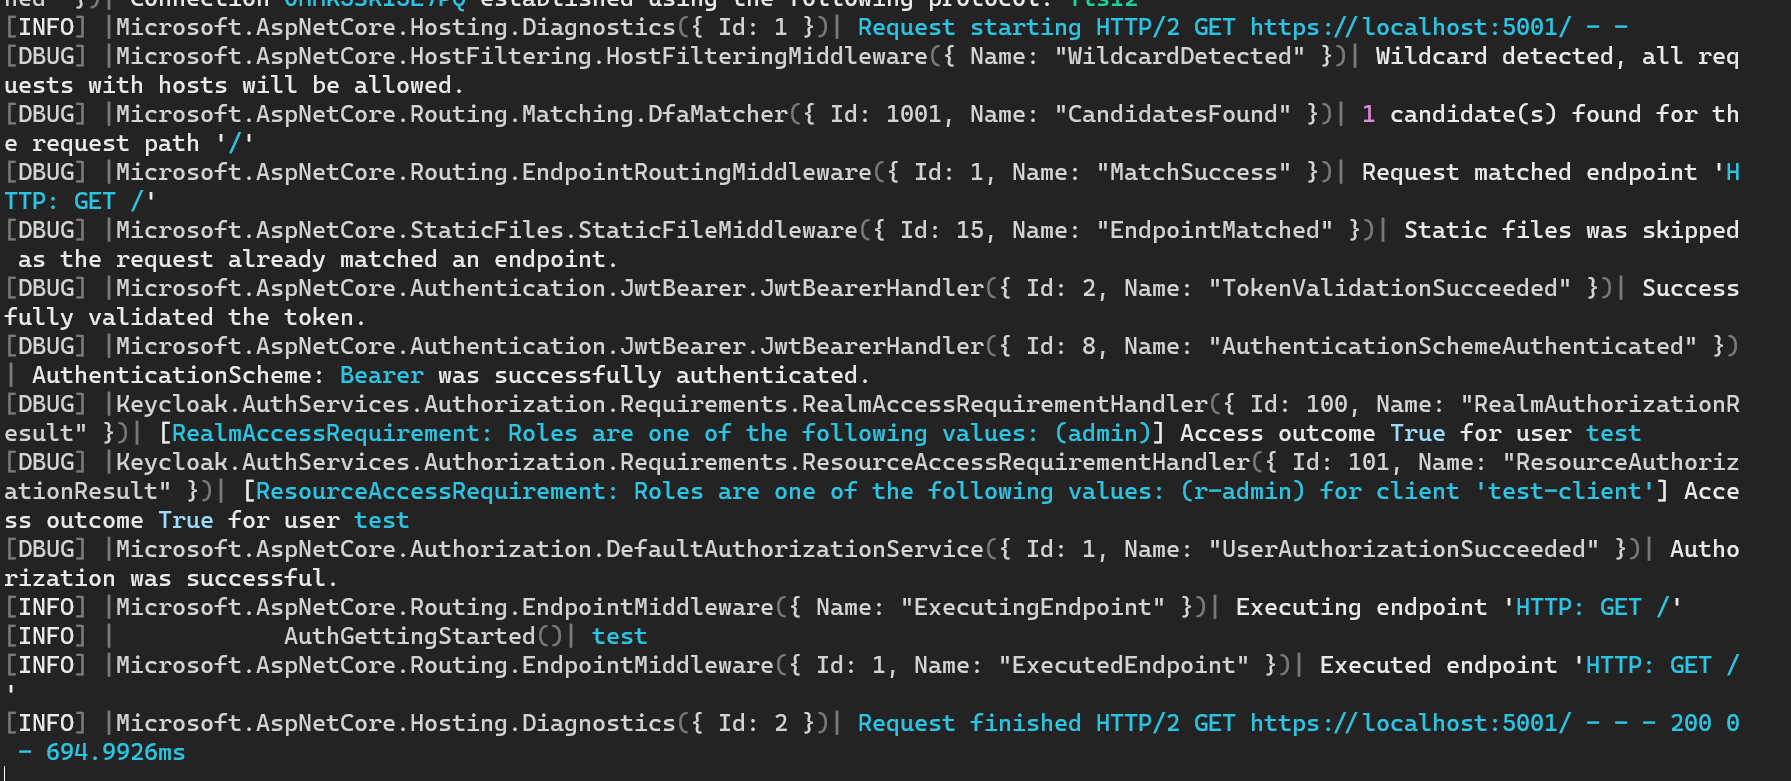
Here is what the logs look like after a successful HTTP GET “/” request.
Summary
You can use Keycloak.AuthServices to integrate with Keycloak. Keycloak has tons of great features and thankfully we can benefit from the Java open-source world as .NET developers.
