- TL;DR
- Example overview
- Backend. Configure Keycloak. Add Authentication
- Frontend. Blazor WASM
- Reference
TL;DR
Learn how to integrate with Keycloak from Blazor WASM. Create a public client and use built-in capabilities of Microsoft.AspNetCore.Components.WebAssembly.Authentication that integrates with OpenId Connect compliant providers.
Source code: https://github.com/NikiforovAll/keycloak-authorization-services-dotnet/blob/main/samples/Blazor
Example overview
Basically, we have a trimmed and modified version of the default template for Blazor WASM. You can generate the code I started from by running dotnet new blazorwasm -n Blazor.
🚀Goal: The main point of interest is to protect “Fetch Data” tab from unauthenticated access and make it possible to access WeatherForecast data from Web API that require authentication.
Therefore, we need to implement some sort of mechanism that unauthorized redirects users to an Identity Provider (i.e.: Keycloak) and, once they logged in successfully, propagates the token from the client to the backend.
Here is a project structure. Note, it is a finished version of the example.
$ tree -L 3
.
├── Client
│   ├── App.razor
│   ├── Blazor.Client.csproj
│   ├── Pages
│   │   ├── Authentication.razor
│   │   ├── FetchData.razor
│   │   └── Index.razor
│   ├── Program.cs
│   ├── Properties
│   │   └── launchSettings.json
│   ├── Shared
│   │   ├── LoginDisplay.razor
│   │   ├── MainLayout.razor
│   │   ├── MainLayout.razor.css
│   │   ├── NavMenu.razor
│   │   ├── NavMenu.razor.css
│   │   └── RedirectToLogin.razor
│   ├── _Imports.razor
│   └── wwwroot
│       ├── css
│       └── index.html
├── Server
│   ├── Blazor.Server.csproj
│   ├── Controllers
│   │   └── WeatherForecastController.cs
│   ├── Pages
│   │   ├── Error.cshtml
│   │   └── Error.cshtml.cs
│   ├── Program.cs
│   ├── Properties
│   │   └── launchSettings.json
│   ├── appsettings.Development.json
│   ├── appsettings.json
├── Shared
│   ├── Blazor.Shared.csproj
│   ├── WeatherForecast.cs
├── assets
│   └── realm-export.json
└── docker-compose.yml
- Client - is a
Microsoft.NET.Sdk.BlazorWebAssemblyproject responsible for UI, a client. - Server - is a
Microsoft.NET.Sdk.Webproject responsible for API, typical backend in your SPA application. - Shared - is a
Microsoft.NET.Sdk, shared code between client and server. Usually, it is used to share data models / DTOs.
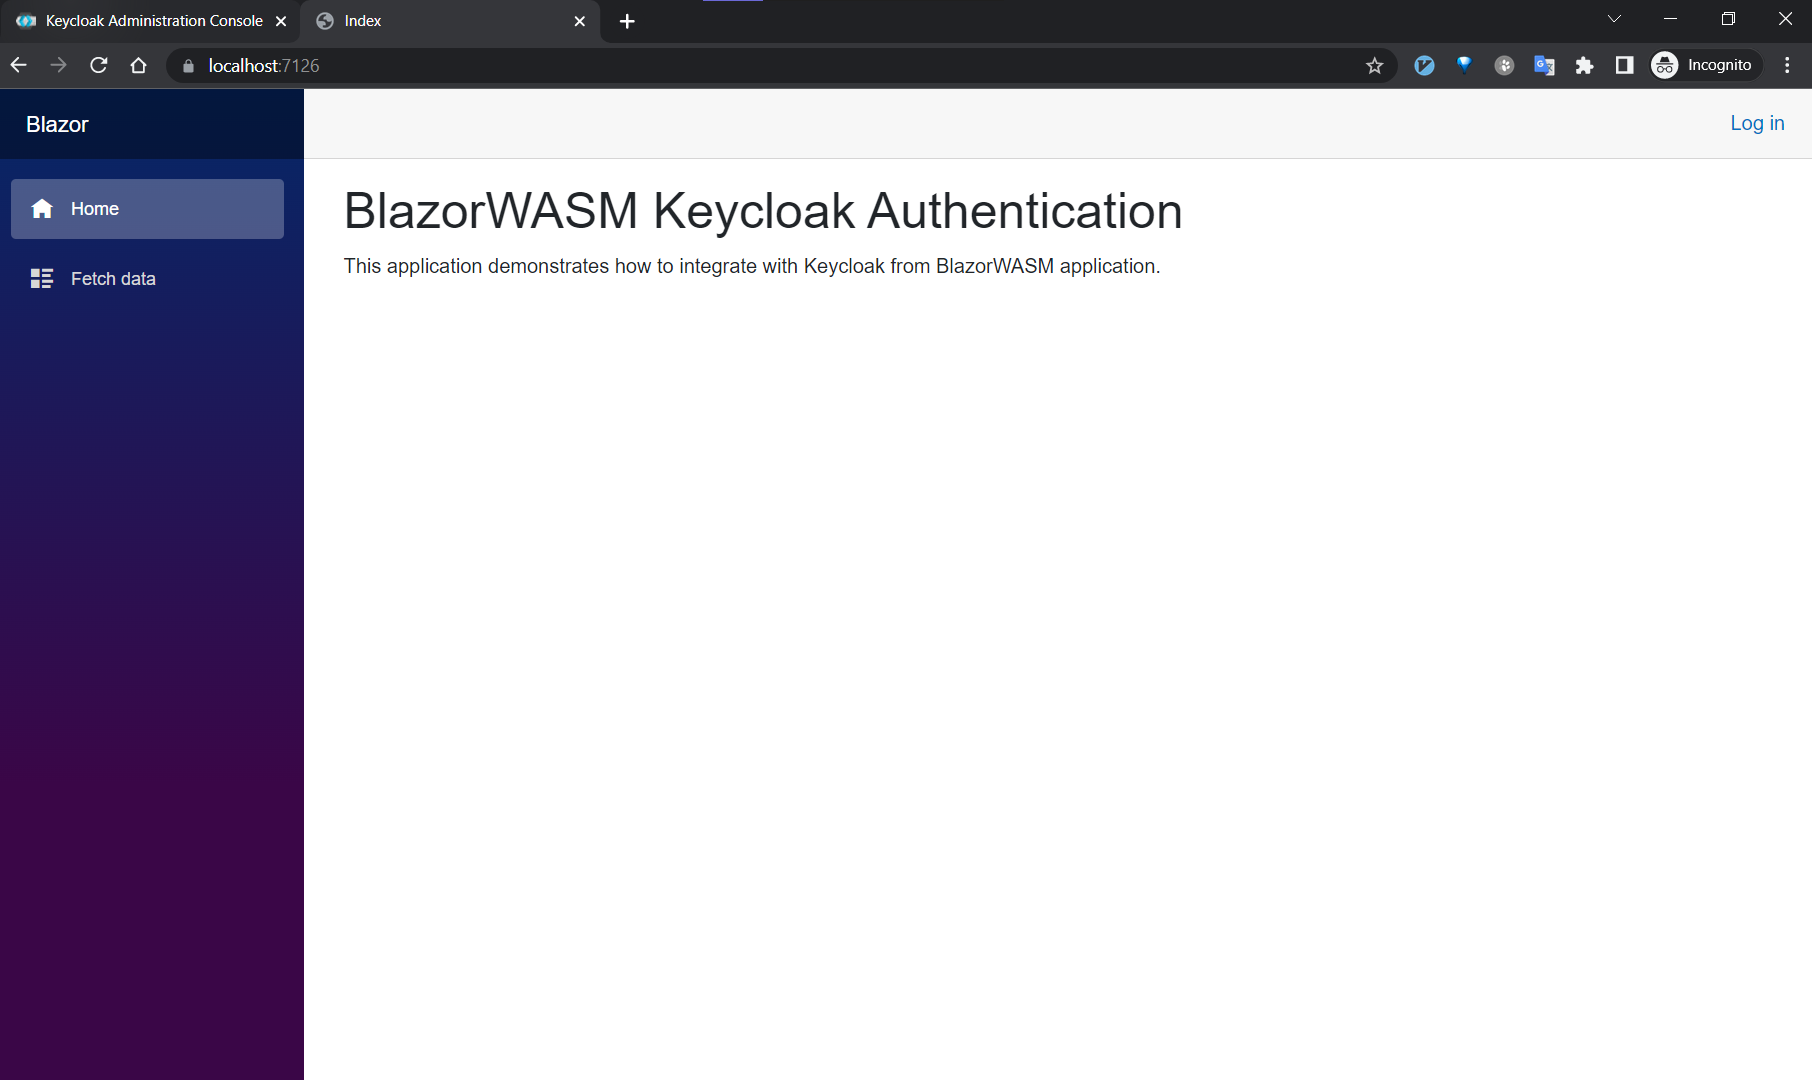
A home page doesn’t require user to be authenticated and looks like this:
Before we look at BlazorWASM (aka client-side), we need to add authentication to a backend.
Backend. Configure Keycloak. Add Authentication
Keycloak supports both OpenID Connect and SAML protocols. OpenID Connect (OIDC) is an authentication protocol that is an extension of OAuth 2.0. While OAuth 2.0 is only a framework for building authorization protocols and is mainly incomplete, OIDC is a full-fledged authentication and authorization protocol. OIDC also makes heavy use of the Json Web Token (JWT) set of standards. These standards define an identity token JSON format and ways to digitally sign and encrypt that data in a compact and web-friendly way.
In my previous blog post - Use Keycloak as Identity Provider in ASP.NET Core 6, I showed you how to configure Keycloak as OAuth2 + OpenID Connect compliant provider to add authentication to Web API. Let’s go through the process one more time 💃
Start Keycloak in a development mode
Here is docker-compose that you can use for development purposes. Create a file named docker-compose.yml and run
docker compose up command.
version: "3.9"
services:
  keycloak:
    image: quay.io/keycloak/keycloak:19.0.1
    environment:
      KEYCLOAK_ADMIN: admin
      KEYCLOAK_ADMIN_PASSWORD: admin
    command:
      [
        'start-dev'
      ]
    ports:
      - 8080:8080
Configure Realm
In order to logically group users of your system we need to create a Realm in the Keycloak. Note, Master Realm should only be used for Keycloak administration purposes.
To create a Realm:
- Navigate at http://localhost:8080/admin/master/console
- On the left side bar click on Realm Dropdown (“Master”)
- Click “Create Realm”
- Specify “Realm name” - Test
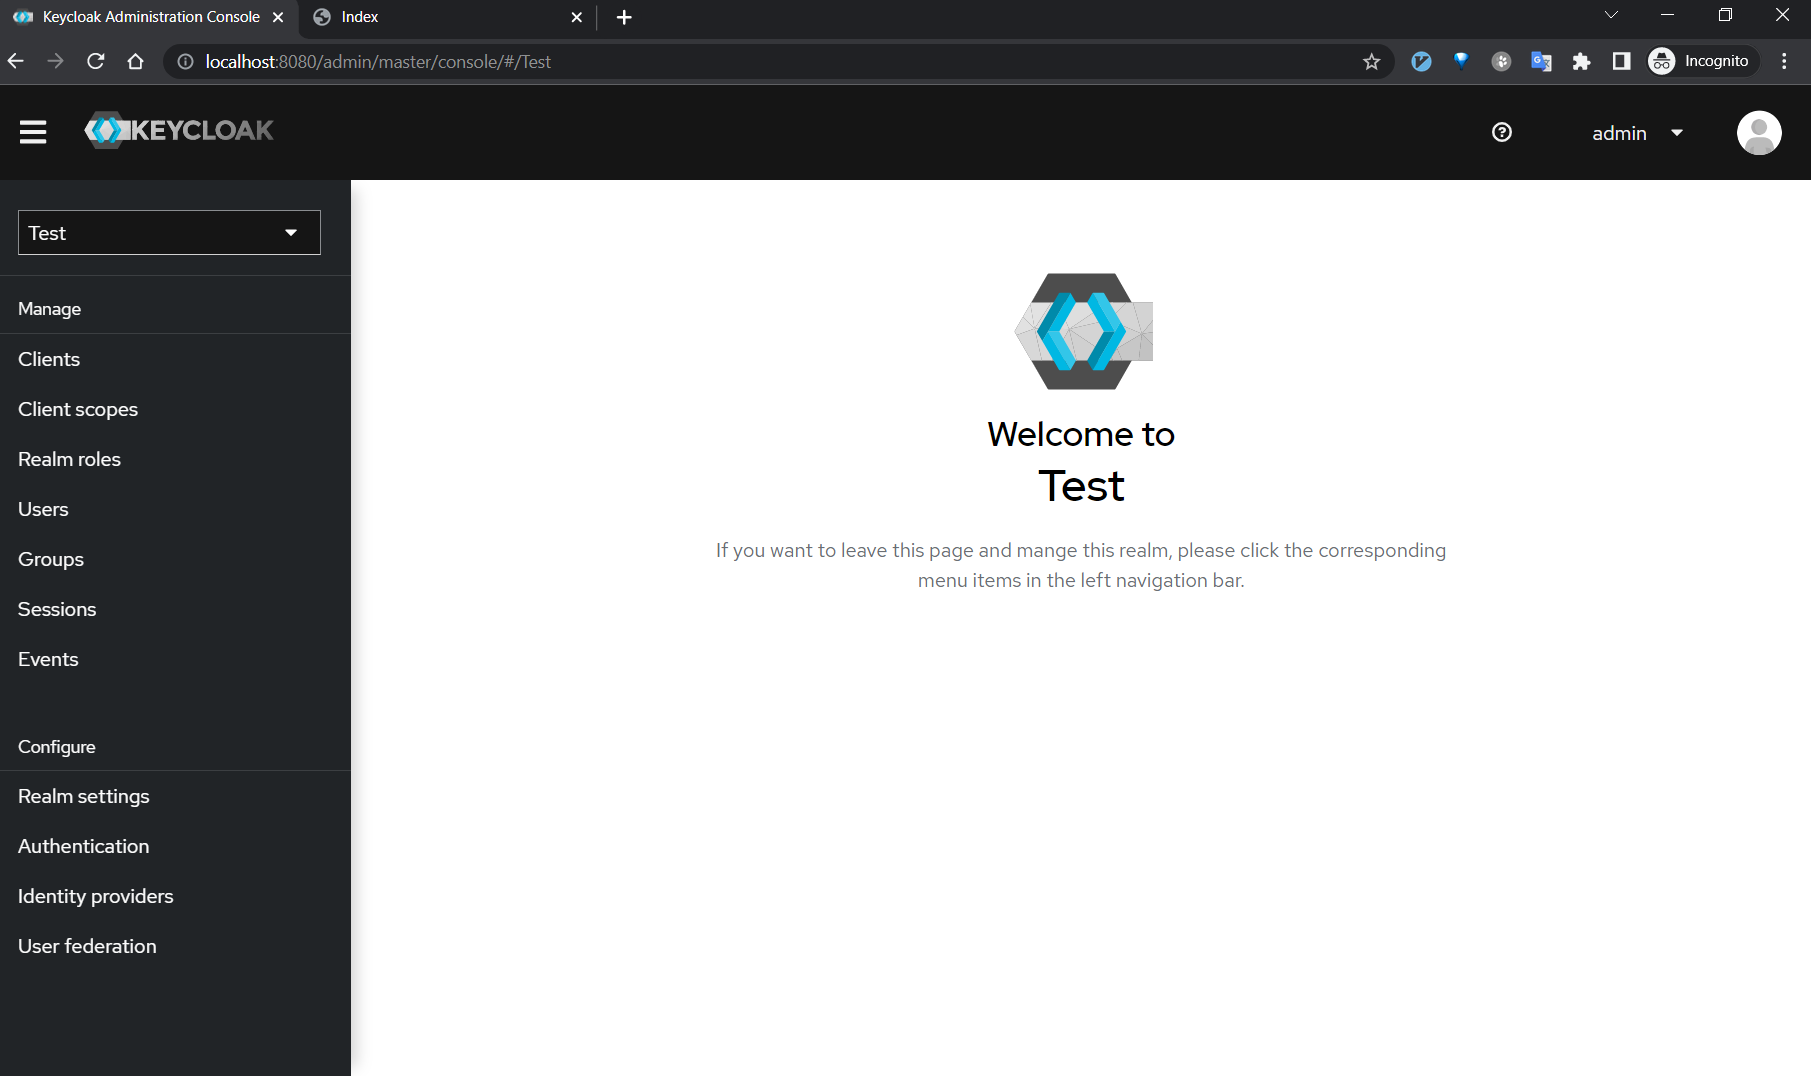
You should see something like that:
Keycloak allows login and sign-up of users by a wide range of social logins (e.g.: microsoft, google, github). But for the simplicity, I will create a user manually.
To Create a user in the “Test” Realm:
- On the left side bar click on “Users” item.
- Click “Create new user”
- Specify user information
- username: user
- email: user@nikiforovall.com
- first name: John
- last name: Doe
- Click “Create”
- Go to “Credentials” tab
- Click “Set password”
- password: user
- password confirmation: user
- temporary: off
- Click “Save”; Click “Set Password”
You should see something like that:

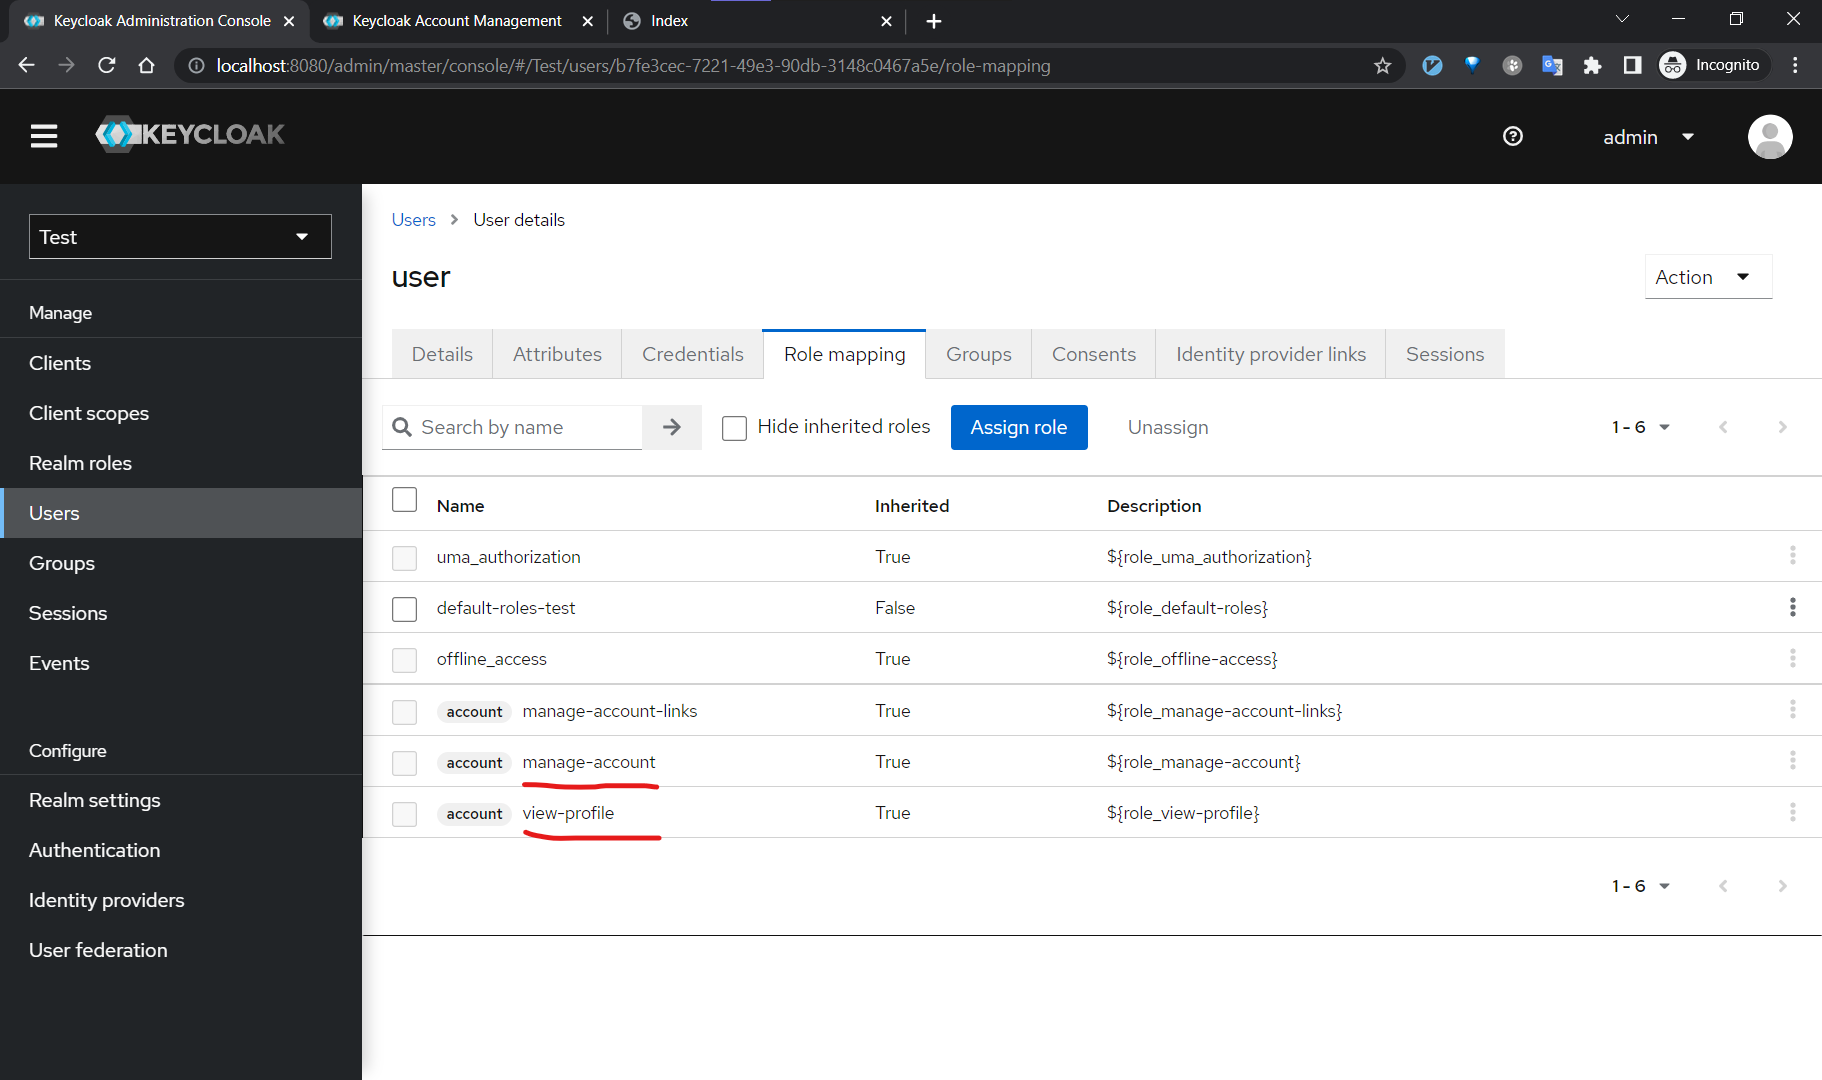
Keycloak, by default, provides user account management functionality. It is available through the inherited role in “Role Mapping” tab in the user account.
To see a user account:
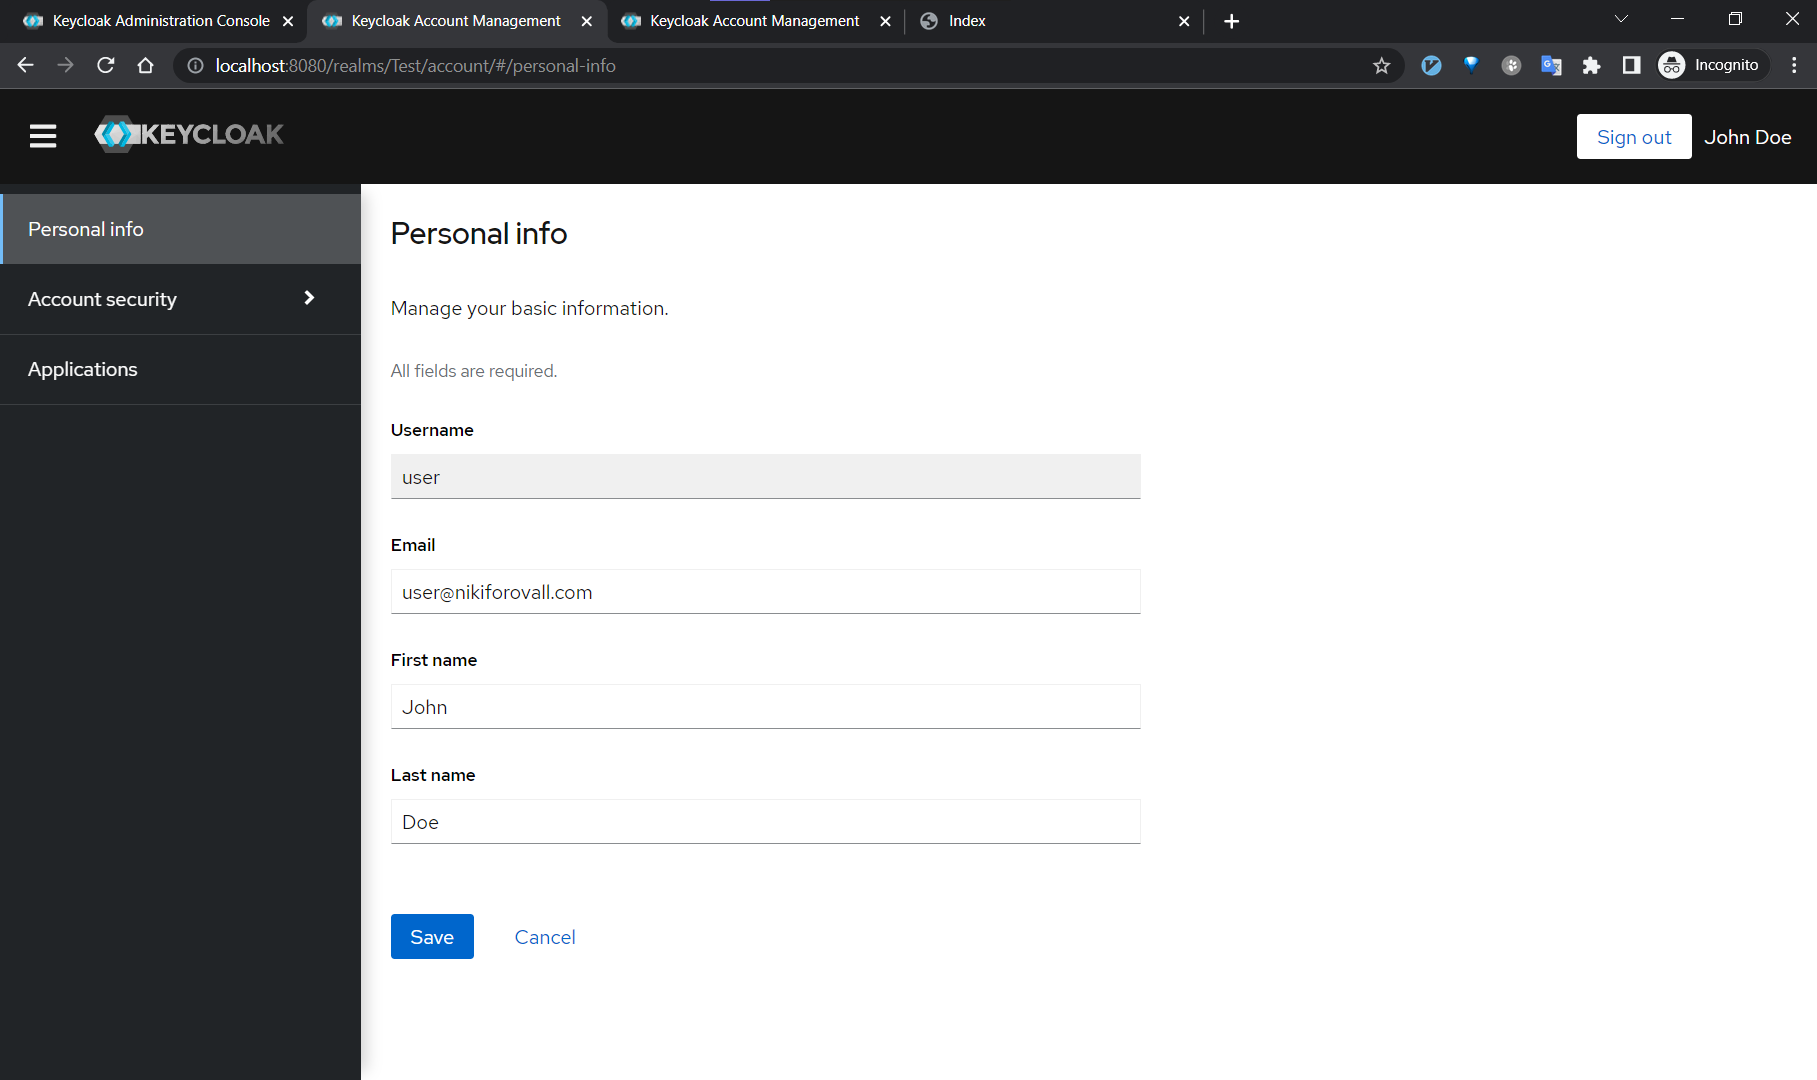
- Navigate at http://localhost:8080/realms/Test/account
- Specify newly created user account credentials - user:user
- Click “Personal Info”
Here is what I see on my screen:
Add Keycloak to backend
Install Keycloak.AuthServices.Authentication package for Blazor.Server project by running the next command from the project folder:
dotnet add package Keycloak.AuthServices.Authentication --version 1.2.1
Here is the simplest integration with Keycloak from .NET perspective:
// Program.cs
var builder = WebApplication.CreateBuilder(args);
var services = builder.Services;
var configuration = builder.Configuration;
services.AddKeycloakAuthentication(configuration);

var app = builder.Build();
app.UseAuthentication();
app.UseAuthorization();
app.Run();
To hookup, the backend with Keycloak we need to create a Client. Later, this client will be used to configure details of user authorization flow.
Clients are entities that interact with Keycloak to authenticate users and obtain tokens. Most often, clients are applications and services acting on behalf of users that provide a single sign-on experience to their users and access other services using the tokens issued by the server. Clients can also be entities only interested in obtaining tokens and acting on their own behalf for accessing other services.
To create a client:
- Open a “Test” realm
- On the left side bar click on “Clients” item.
- Click “Create client”
- specify client-id: test-client
- Click “Next”
- Check “Implicit flow” (we will use it for swagger, useful for the development)
- “Save”
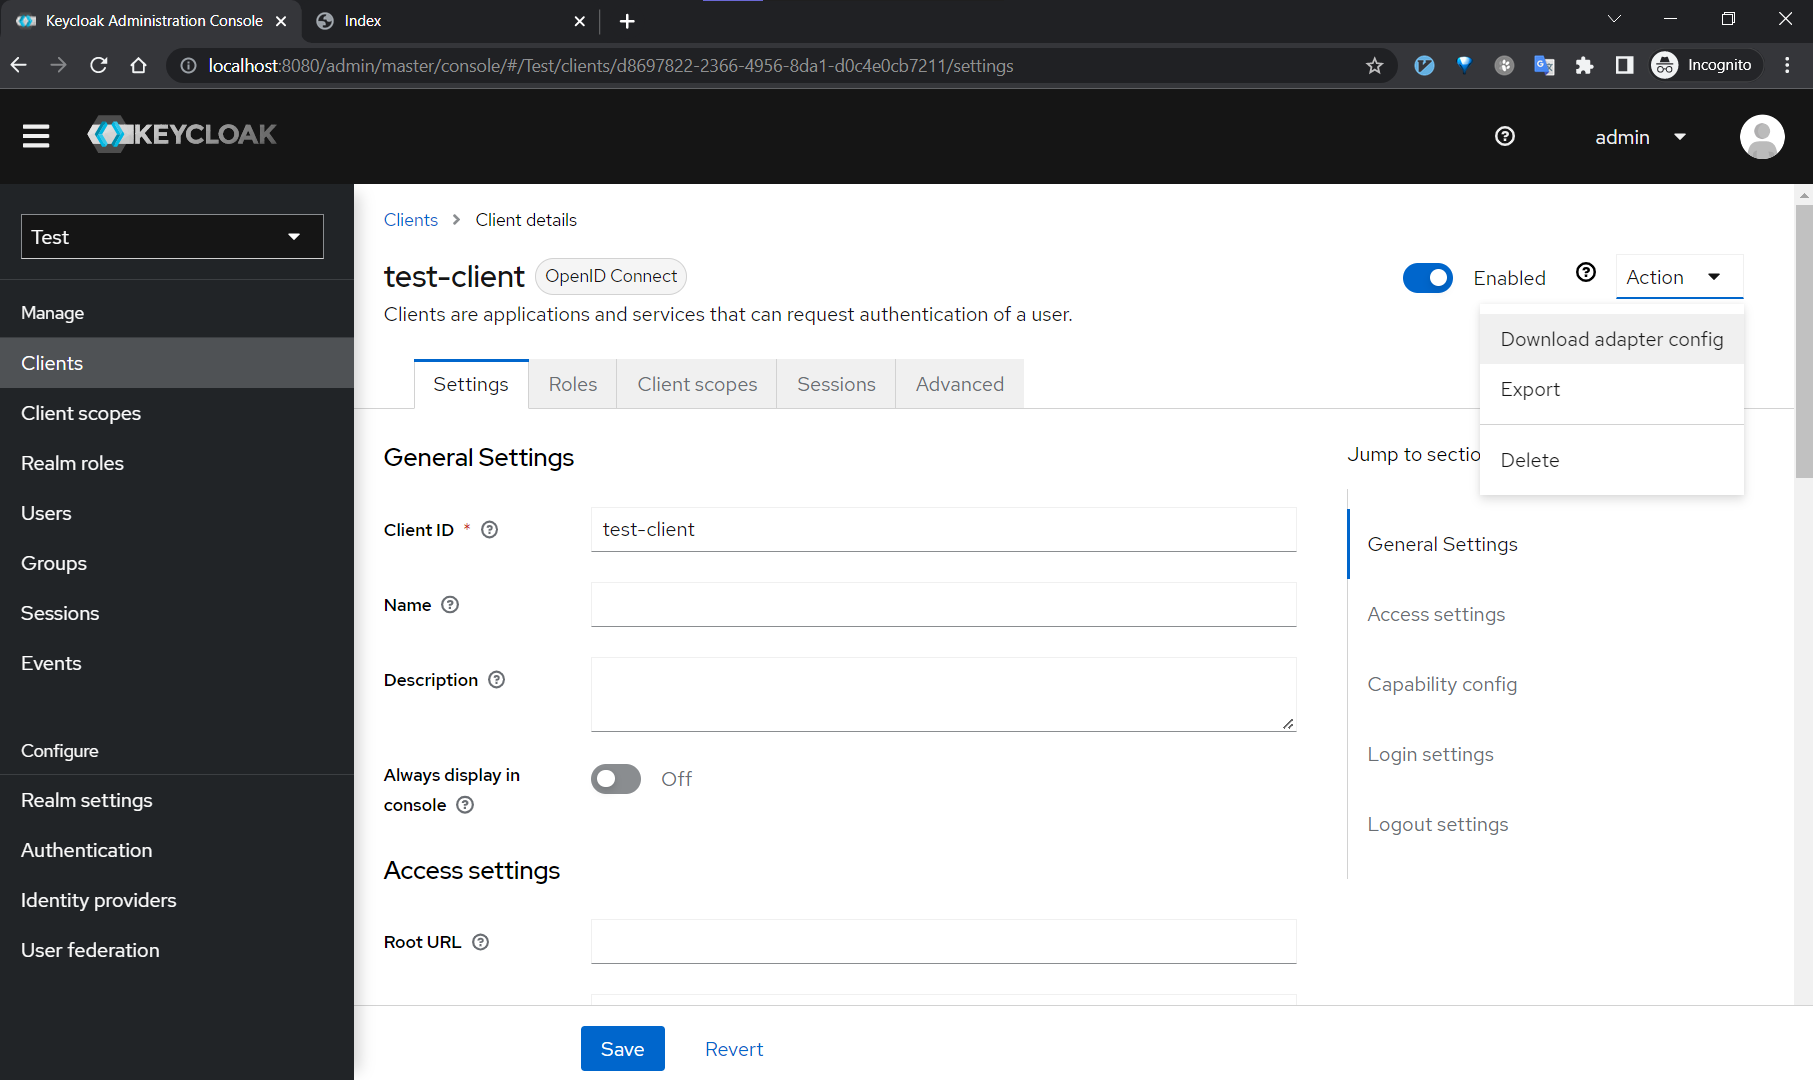
Now, we can download something called adapter config. On the top-right click “Action” dropdown and select “Download adapter config” option. Like this:
Open appsettings.Development.json and paste as follows:
{
    "Keycloak": {
        "realm": "Test",
        "auth-server-url": "http://localhost:8080/",
        "ssl-required": "none",
        "resource": "test-client",
        "verify-token-audience": true,
        "credentials": {
            "secret": ""
        },
        "confidential-port": 0
    }
}
💡⚠ Note, by default,
Keycloak.AuthServices.Authenticationassumes that the intended Audience is the “resource”. And it is something that we must configure additionally forquay.io/keycloak/keycloak:19.0.1. Alternatively, for development purposes, you may want to change “resource” to the audience that is provided by default - “account”.
Let’s see how to add an audience to a client by using client scopes. Client scope defines a set of mappers that shape the content of access and id tokens. For example, all newly created clients by default have a bunch of client scopes assigned such as email, profile, roles. As you might guess, these client scopes are responsible for adding well-known claims as part of the OpenId Connect protocol.
- On the left side bar click on “Clients” item.
- Click “test-client”
- Open “Client scopes” tab
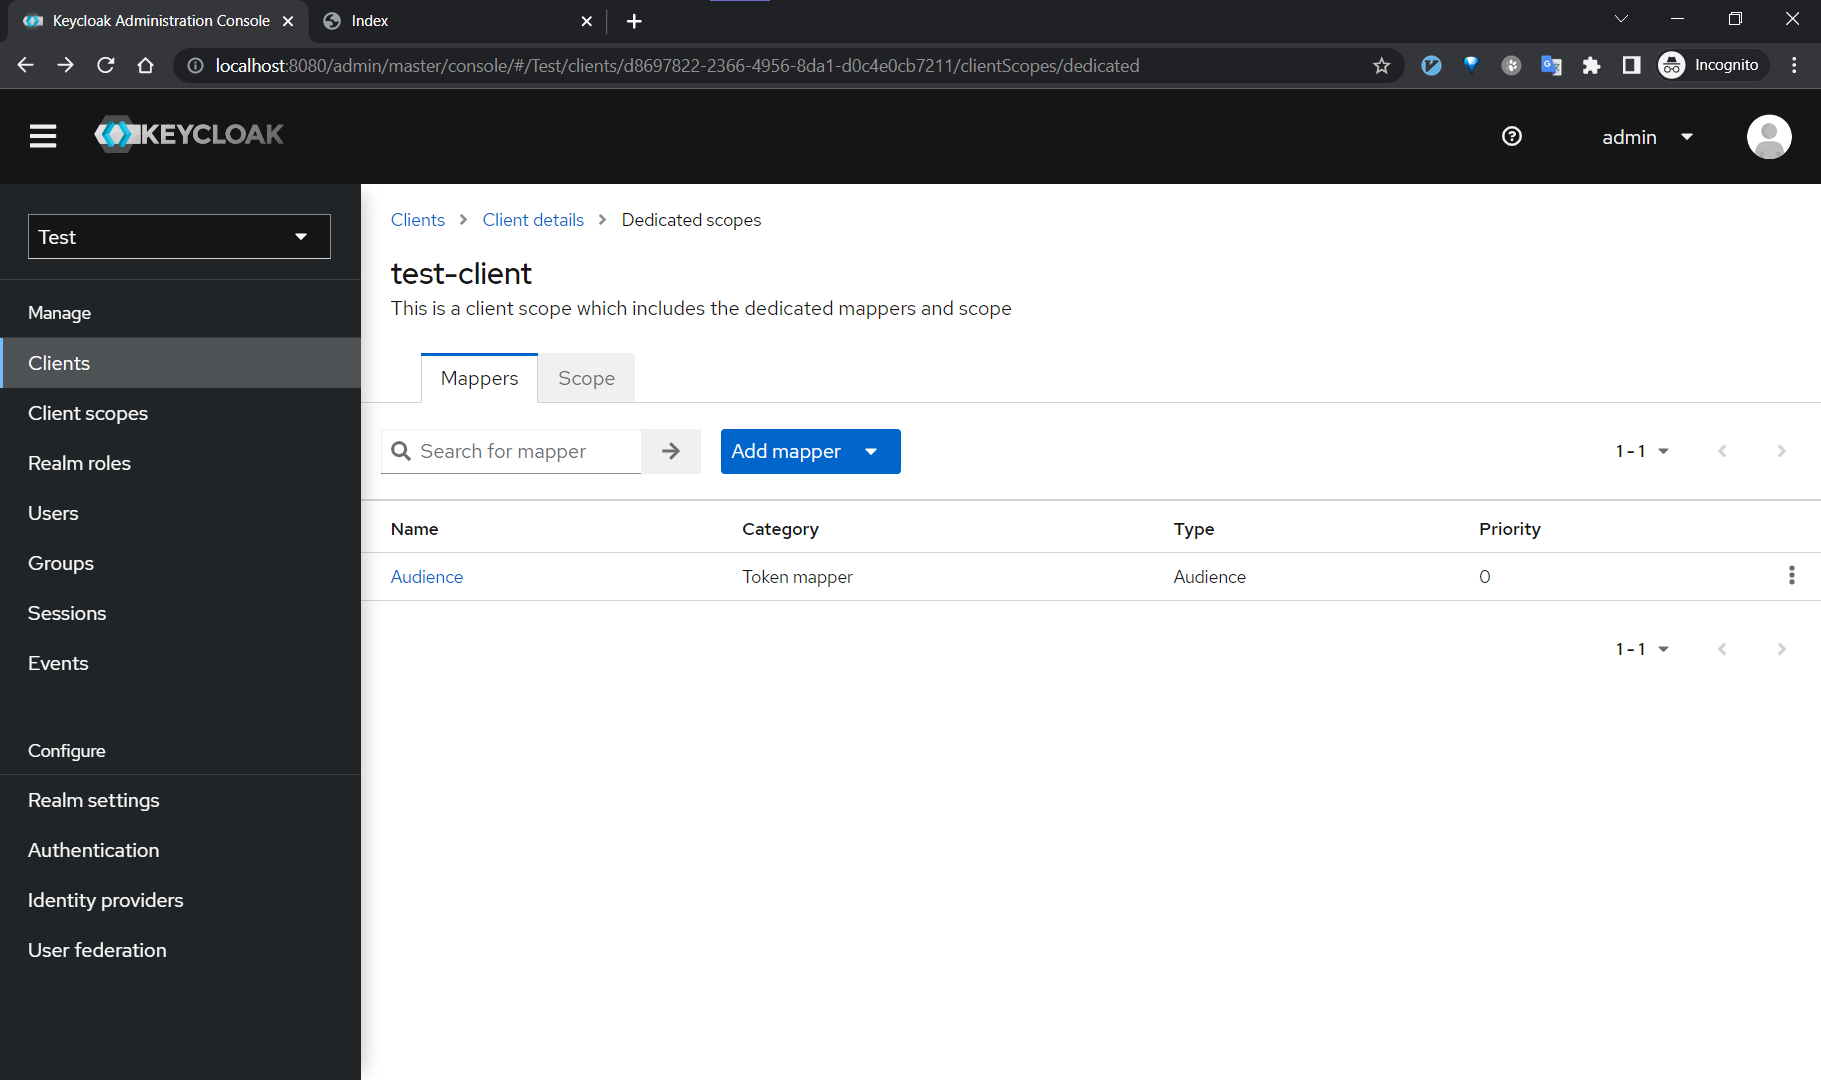
- Click on “test-client-dedicated”, should be on tope of the list of scopes
- From the “Mappers” tab, click “Create a new mapper”
- Pick “Audience” from the list
- specify name: Audience
- include client audience: “test-client”
- Click “Save”
Here is the result:
Besides “Setup” sub-tab, “Client Scopes” tab has “Evaluate” sub-tab. It might come in handy when you need to figure out effective protocol mappers, effective role scope mappings, the content of access, and id tokens.
From the “Evaluate” sub-tab specify “User” = “John Doe” and client “Generate ID token” down-right corner.
{
    "exp": 1670420420,
    "iat": 1670420120,
    "jti": "a5ee2c73-f3e9-495c-8d7c-eb75909b9b16",
    "iss": "http://localhost:8080/realms/Test",
    "aud": [
        "test-client",
        "account"
    ],
    "sub": "b7fe3cec-7221-49e3-90db-3148c0467a5e",
    "typ": "Bearer",
    "azp": "test-client",
    "session_state": "77243a94-ed91-4d5c-a03b-d8fb988cee81",
    "acr": "1",
    "realm_access": {
        "roles": [
            "default-roles-test",
            "offline_access",
            "uma_authorization"
        ]
    },
    "resource_access": {
        "account": {
            "roles": [
                "manage-account",
                "manage-account-links",
                "view-profile"
            ]
        }
    },
    "scope": "openid profile email",
    "sid": "77243a94-ed91-4d5c-a03b-d8fb988cee81",
    "email_verified": false,
    "name": "John Doe",
    "preferred_username": "user",
    "given_name": "John",
    "family_name": "Doe",
    "email": "user@nikiforovall.com"
}
Sure enough, we can see the “test-client” in the intended audience claim “aud”. Make sure it is specified in “resource” from the Keycloak adapter config file and we are ready to access some APIs.
Get access token from Swagger UI
Swashbuckle.AspNetCore can be configured to retrieve access tokens based on “OpenID Endpoint Configuration”. Keycloak serves at a well-known endpoint “http://localhost:8080/realms/{realm}/.well-known/openid-configuration”. This way, Swagger UI will add all possible flows to retrieve an access token.
// Program.cs
services.AddEndpointsApiExplorer();

var openIdConnectUrl = $"{configuration["Keycloak:auth-server-url"]}"
 + "realms/{configuration["Keycloak:realm"]}/"
 + ".well-known/openid-configuration";

services.AddSwaggerGen(c =>
{
    var securityScheme = new OpenApiSecurityScheme
    {
        Name = "Auth",
        In = ParameterLocation.Header,
        Type = SecuritySchemeType.OpenIdConnect,
        OpenIdConnectUrl = new Uri(openIdConnectUrl),
        Scheme = "bearer",
        BearerFormat = "JWT",
        Reference = new OpenApiReference
        {
            Id = "Bearer",
            Type = ReferenceType.SecurityScheme
        }
    };
    c.AddSecurityDefinition(securityScheme.Reference.Id, securityScheme);
    c.AddSecurityRequirement(new OpenApiSecurityRequirement
    {
        {securityScheme, Array.Empty<string>()}
    });
});
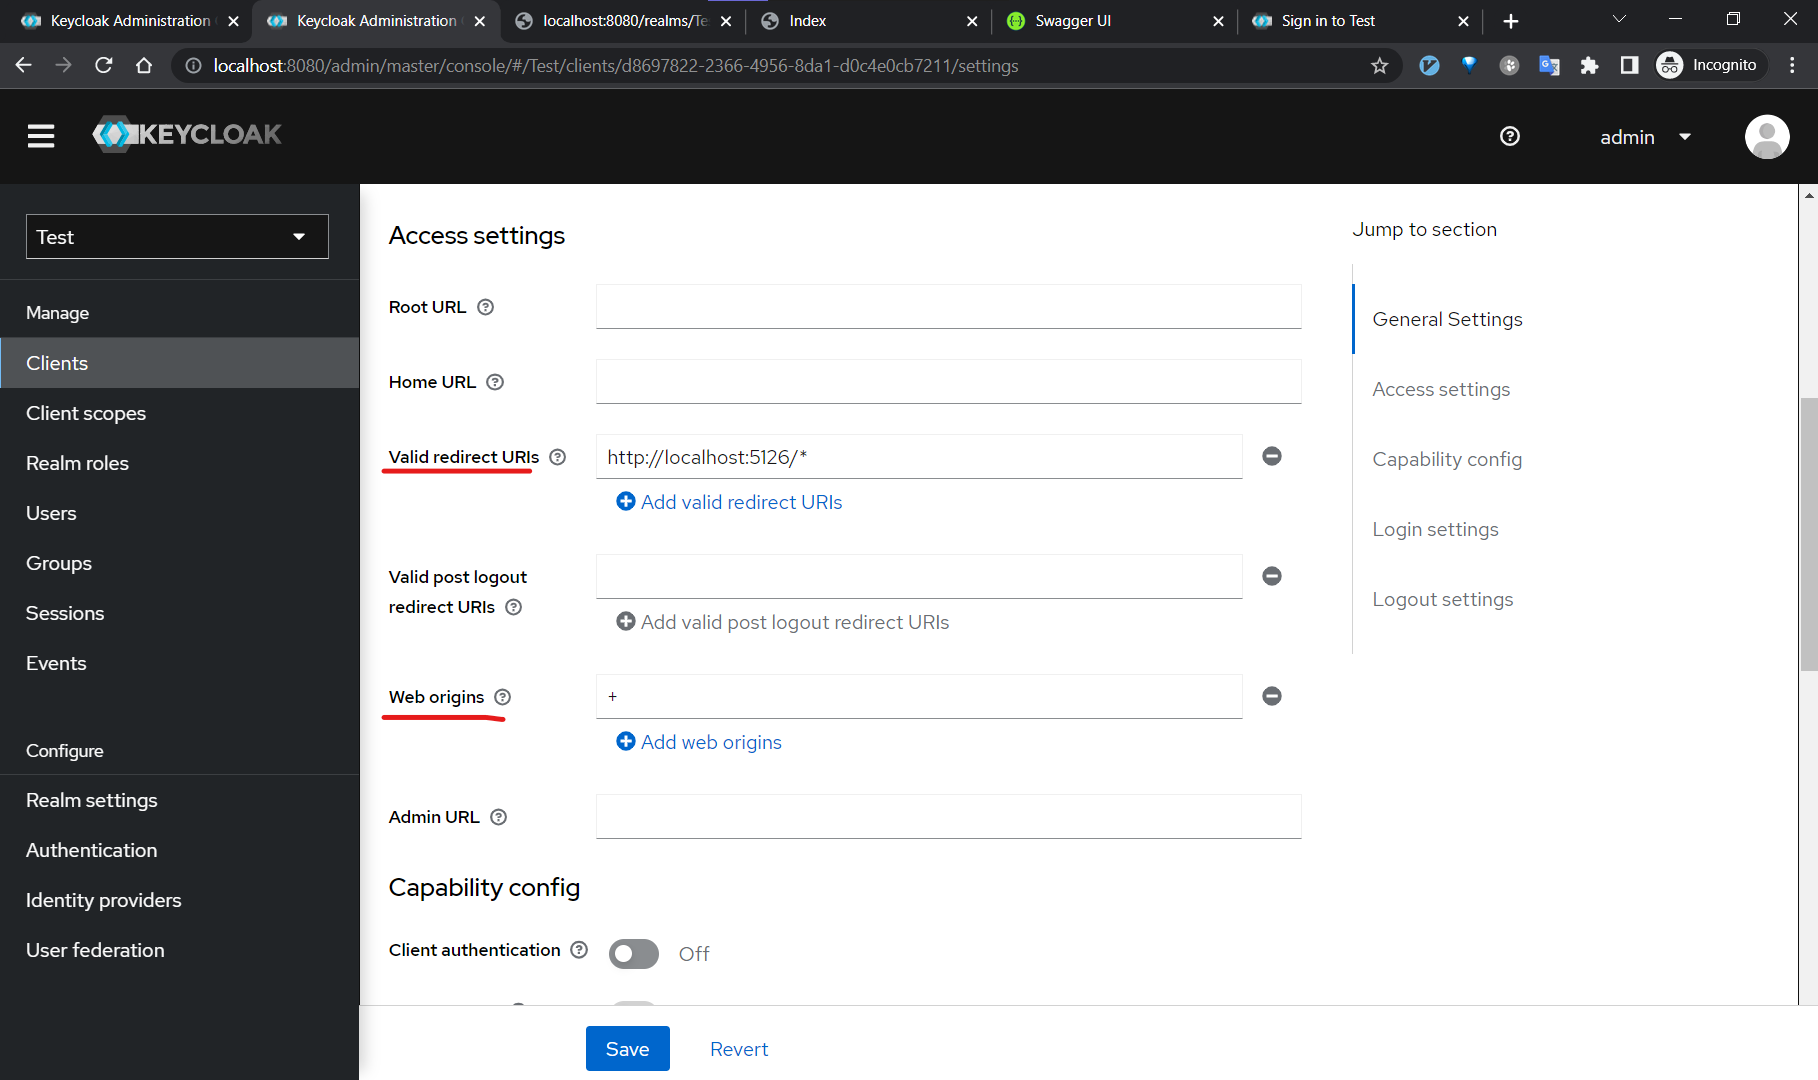
For Swagger UI, I tend to use an “Implicit Flow”, therefore, we need to configure a valid redirect URI in order to prevent Keycloak from redirecting to malicious URLs.
- On the left side bar click on “Clients” item.
- Click “test-client”
- Open “Settings” tab
- Add Swagger UI URL http://localhost:5126/* to “Valid redirect URIs”
- In “Web Origins” specify +
- Click “Save”
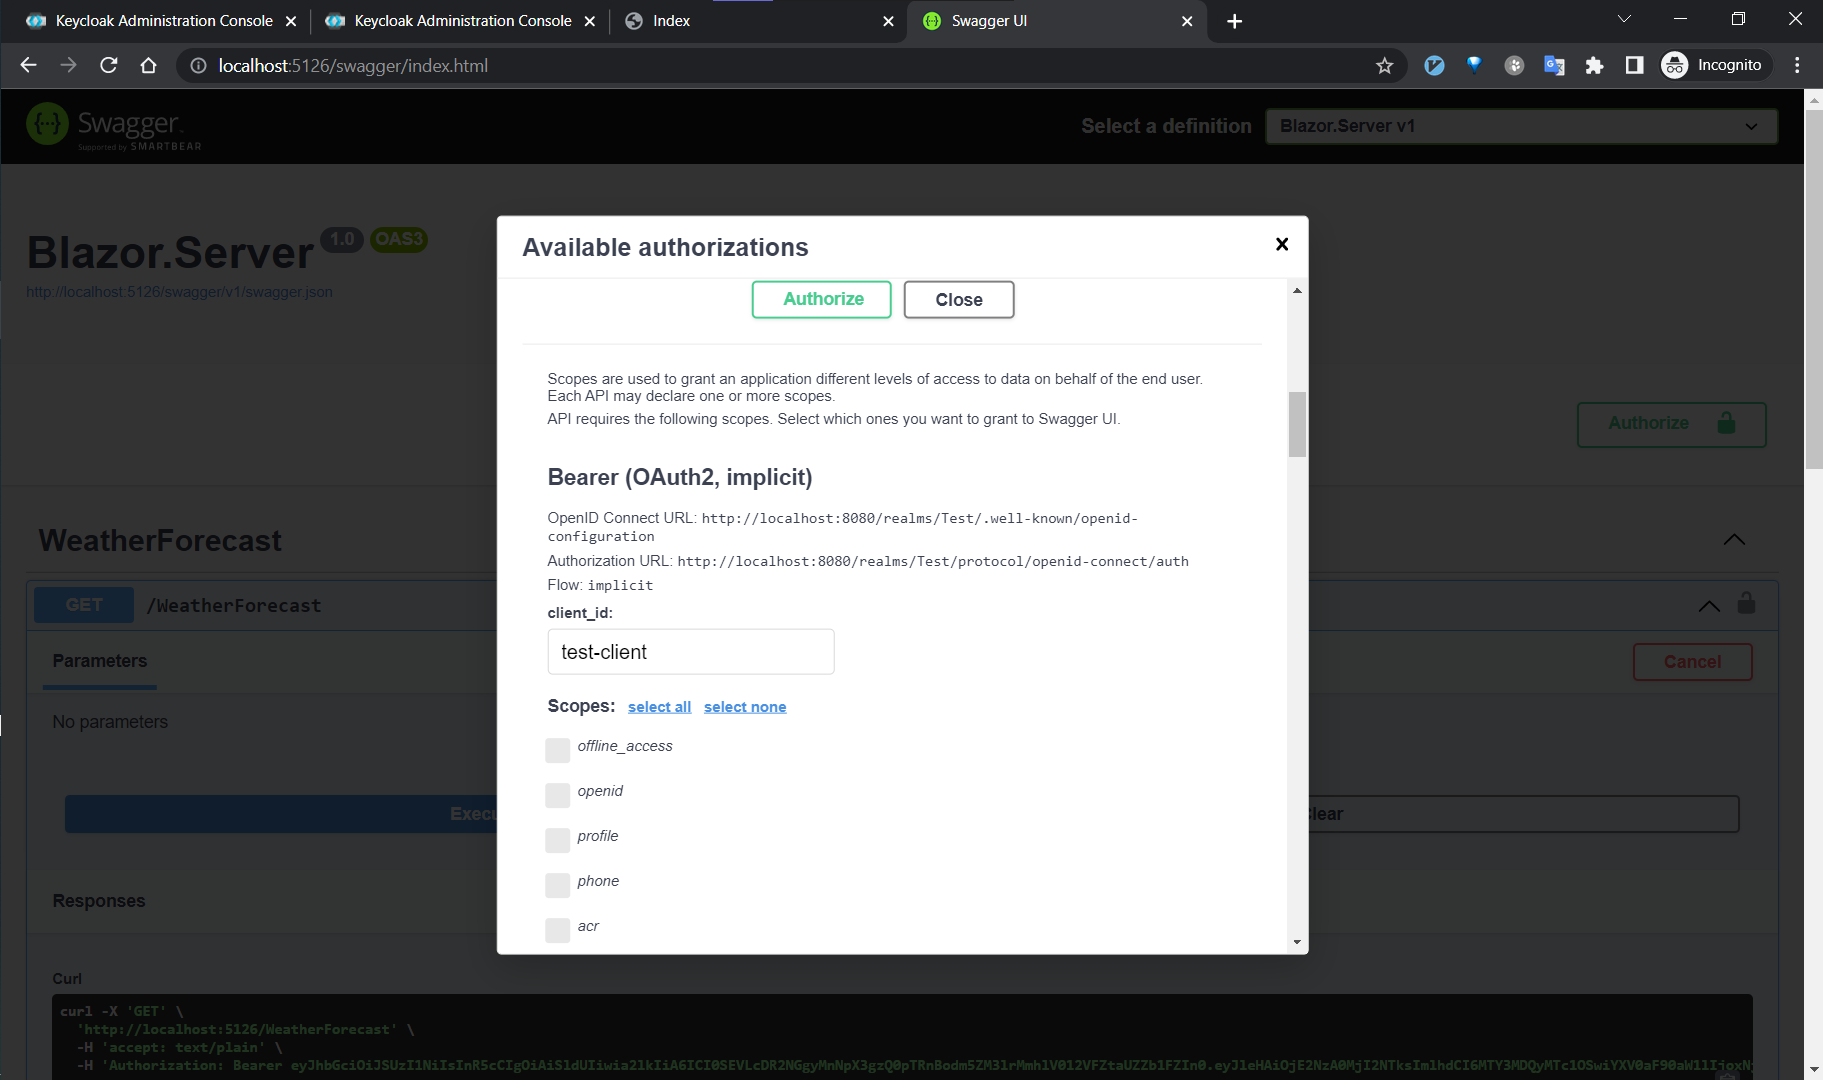
- Navigate http://localhost:5126/swagger/index.html and click “Authorize” button.
- Scroll down to “Bearer (OAuth2, implicit)”
- Specify client id: “test-client”
- Click “Authorize” button
- You will be redirected to Keycloak to enter the credentials (user:user)
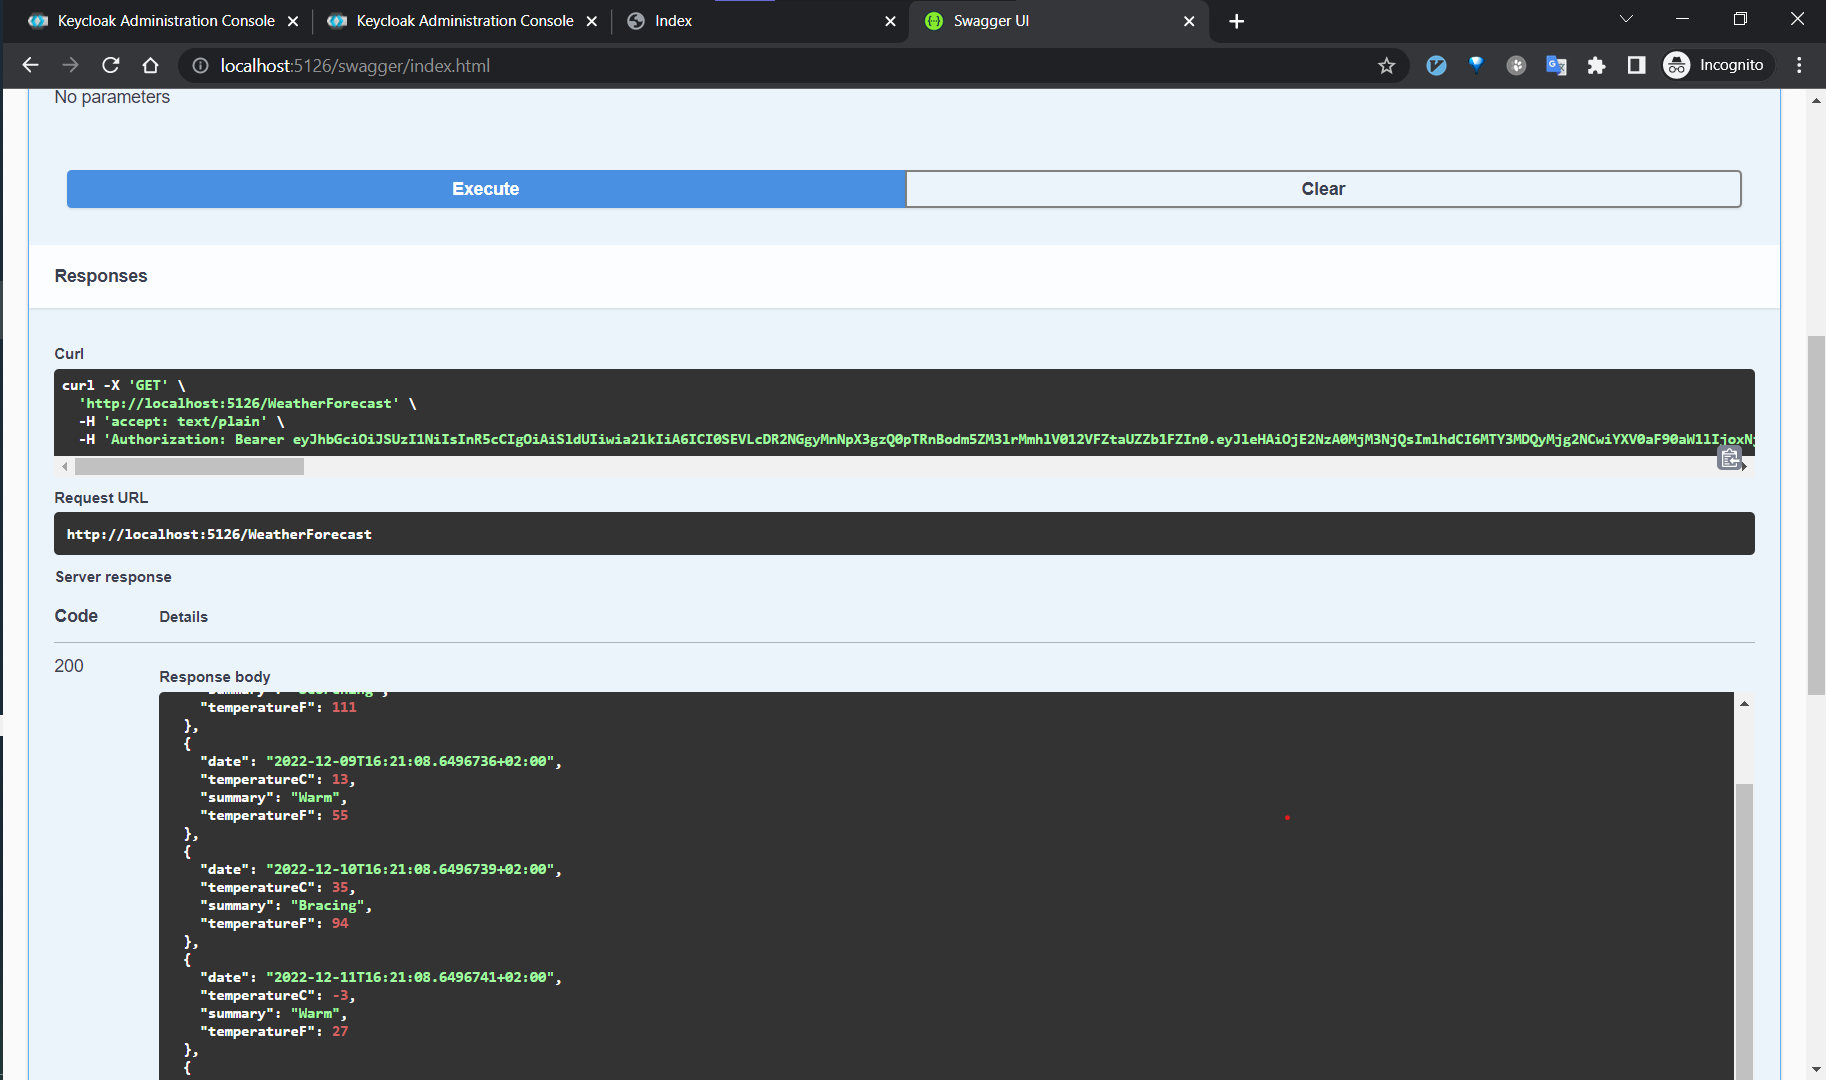
Now, we can test the API from Swagger UI:
Frontend. Blazor WASM
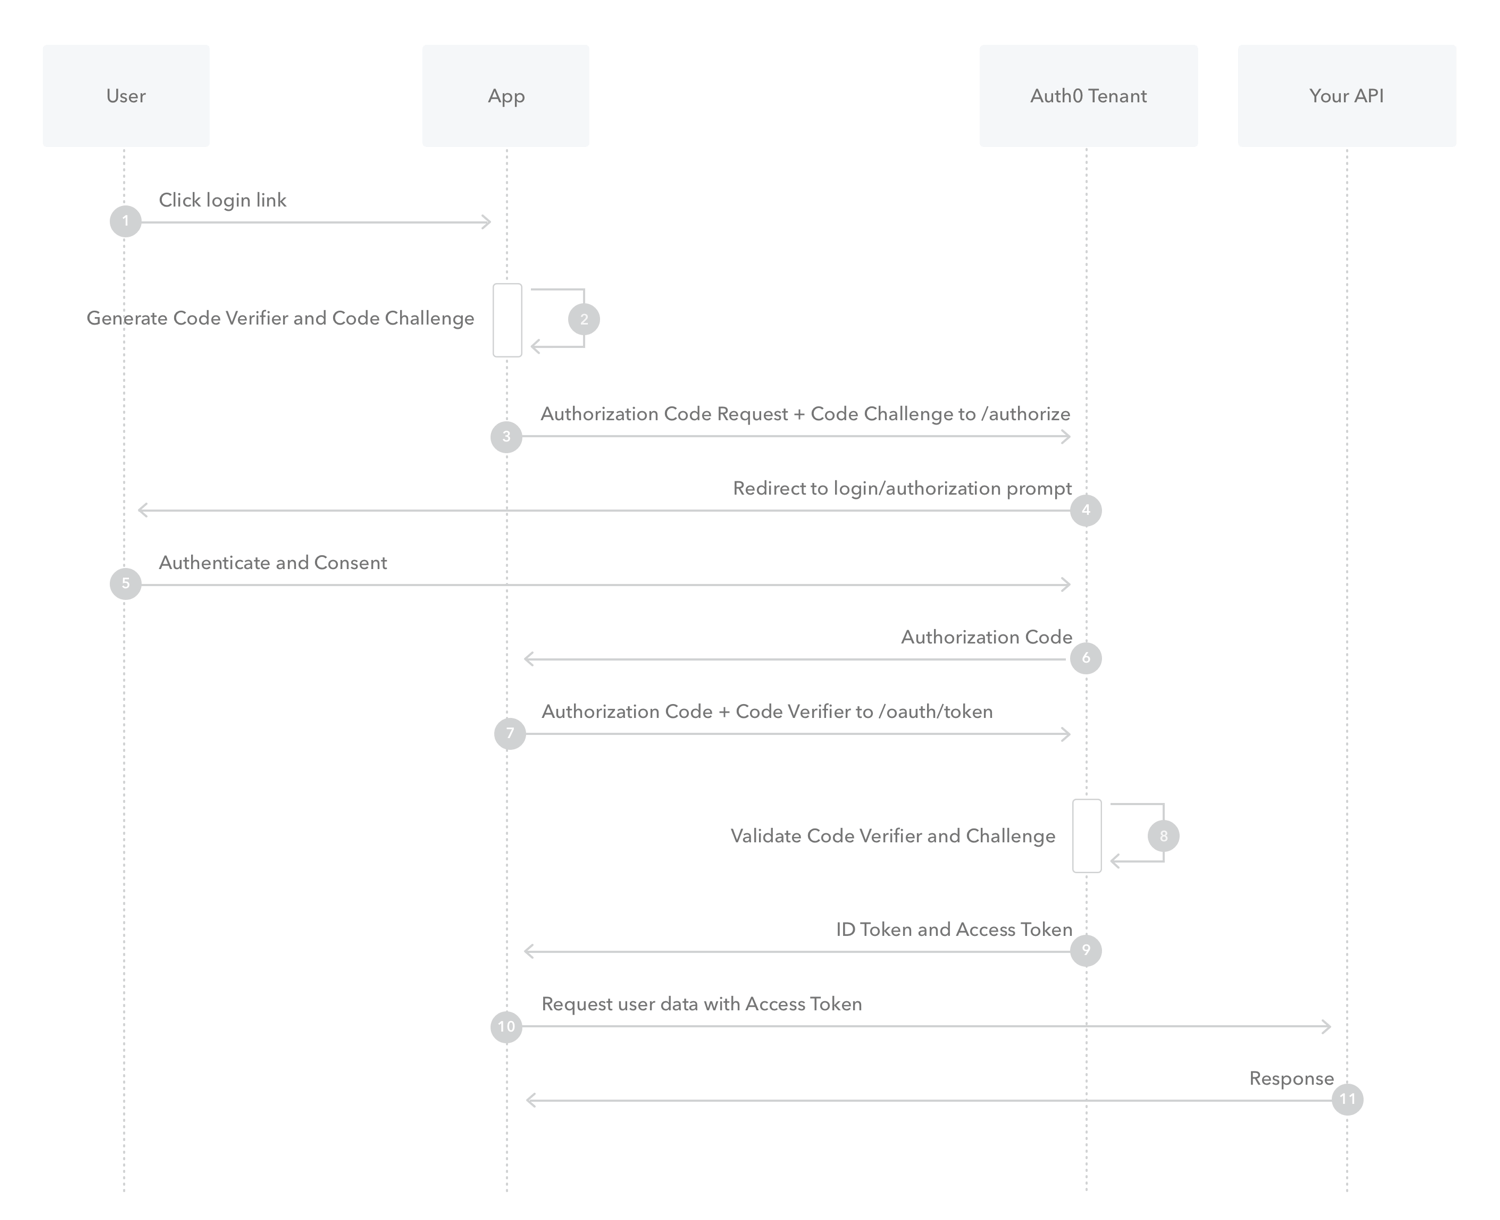
Let’s start with basic principles. When a client (frontend) wants to gain access to remote services it asks Keycloak to get an access token it can use to invoke other remote services on behalf of the user. Keycloak authenticates the user and then asks the user for consent to grant access to the client requesting it. The client then receives the access token. This access token is digitally signed by the realm. The client can make HTTP invocations on remote services using this access token. The Web API extracts the access token, verifies the signature of the token, then decides based on access information within the token whether to process the request.
To get an access token securely, we need to consider various characteristics of an application performing the action. There are several different flows in the OAuth2 protocol. But for public clients (clients that can’t store secrets securely, e.g.: Native apps/SPAs) the current recommended flow is “Authorization Code Flow with PKCE”. This flow is an extension of the “Authorization Code Flow”. Proof Key for Code Exchange (abbreviated PKCE, pronounced “pixie”) prevents CSRF and authorization code injection attacks. The technique involves the client first creating a secret on each authorization request, and then using that secret again when exchanging the authorization code for an access token. This way if the code is intercepted, it will not be useful since the token request relies on the initial secret. However PKCE is not a replacement for a client secret, and PKCE is recommended even if a client is using a client secret since apps with a client secret are still susceptible to authorization code injection attacks.
Integrate with Keycloak from the frontend. Overview
Blazor uses the existing ASP.NET Core authentication mechanisms to establish the user’s identity. The exact mechanism depends on how the Blazor app is hosted, Blazor WebAssembly or Blazor Server.
Blazor WebAssembly supports authenticating and authorizing apps using OIDC via the Microsoft.AspNetCore.Components.WebAssembly.Authentication library. The library provides a set of primitives for seamlessly authenticating against ASP.NET Core backends. The authentication support in Blazor WebAssembly is built on top of the oidc-client.js library, which is used to handle the underlying authentication protocol details.
Other options for authenticating SPAs exist, such as the use of SameSite cookies. However, the engineering design of Blazor WebAssembly is settled on OAuth and OIDC as the best option for authentication in Blazor WebAssembly apps. Token-based authentication based on JSON Web Tokens (JWTs) was chosen over cookie-based authentication for functional and security reasons
In broad terms, authentication works as follows:
- When an anonymous user selects the login button or requests a page with the [Authorize] attribute applied, the user is redirected to the app’s login page (/authentication/login).
- On the login page, the authentication library prepares for a redirect to the authorization endpoint. The authorization endpoint is outside of the Blazor WebAssembly app and can be hosted at a separate origin. The endpoint is responsible for determining whether the user is authenticated and for issuing one or more tokens in response. The authentication library provides a login callback to receive the authentication response.
- When the Blazor WebAssembly app loads the login callback endpoint (/authentication/login-callback), the authentication response is processed.
Authentication component
The Authentication component handles remote authentication operations and permits the app to:
- Configure app routes for authentication states.
- Set UI content for authentication states.
- Manage authentication state.
@page "/authentication/{action}"
@using Microsoft.AspNetCore.Components.WebAssembly.Authentication
<RemoteAuthenticatorView Action="@Action" />

@code{
    [Parameter] public string? Action { get; set; }
}
The Index page (wwwroot/index.html) page includes a script that defines the AuthenticationService in JavaScript. AuthenticationService handles the low-level details of the OIDC protocol. The app internally calls methods defined in the script to perform the authentication operations.
<script src="_content/Microsoft.AspNetCore.Components.WebAssembly.Authentication/AuthenticationService.js"></script>
For more details and full instructions, please follow https://learn.microsoft.com/en-us/aspnet/core/blazor/security/webassembly/standalone-with-authentication-library.
App Component
//App.razor
<CascadingAuthenticationState>
    <Router AppAssembly="@typeof(App).Assembly">
        <Found Context="routeData">
            <AuthorizeRouteView RouteData="@routeData" DefaultLayout="@typeof(MainLayout)">
                <NotAuthorized>
                    @if (context.User.Identity?.IsAuthenticated != true)
                    {
                        <RedirectToLogin />
                    }
                    else
                    {
                        <p role="alert">You are not authorized to access this resource.</p>
                    }
                </NotAuthorized>
            </AuthorizeRouteView>
            <FocusOnNavigate RouteData="@routeData" Selector="h1" />
        </Found>
        <NotFound>
            <PageTitle>Not found</PageTitle>
            <LayoutView Layout="@typeof(MainLayout)">
                <p role="alert">Sorry, there's nothing at this address.</p>
            </LayoutView>
        </NotFound>
    </Router>
</CascadingAuthenticationState>
- The
CascadingAuthenticationStatecomponent manages exposing theAuthenticationStateto the rest of the app. - The
AuthorizeRouteViewcomponent makes sure that the current user is authorized to access a given page or otherwise renders theRedirectToLogincomponent. - The
RedirectToLogincomponent manages redirecting unauthorized users to the login page.
// RedirectToLogin.razor
@inject NavigationManager Navigation

@code {
    protected override void OnInitialized()
    {
        Navigation.NavigateTo($"authentication/login?returnUrl={Uri.EscapeDataString(Navigation.Uri)}");
    }
}
Configure AuthenticationService
Support for authenticating users is registered in the service container with the AddOidcAuthentication extension method provided by the Microsoft.AspNetCore.Components.WebAssembly.Authentication package. This method sets up the services required for the app to interact with the Identity Provider (IP).
The code below should be pretty self-explanatory:
// Program.cs
var builder = WebAssemblyHostBuilder.CreateDefault(args);

builder.Services.AddOidcAuthentication(options =>
{
    options.ProviderOptions.MetadataUrl = "http://localhost:8080/realms/Test/.well-known/openid-configuration";
    options.ProviderOptions.Authority = "http://localhost:8080/realms/Test";
    options.ProviderOptions.ClientId = "test-client";
    options.ProviderOptions.ResponseType = "id_token token";

    options.UserOptions.NameClaim = "preferred_username";
    options.UserOptions.RoleClaim = "roles";
    options.UserOptions.ScopeClaim = "scope";
});
Now, we want to be able to use “client roles” as roles in ASP.NET Core Identity in Blazor WASM. To do that we need to create an additional mapper.
- On the left side bar click on “Clients” item.
- Click “test-client”
- Open “Client scopes” tab
- Click on “test-client-dedicated”, should be on top of the list of scopes
- From the “Mappers” tab, click “Create a new mapper”
- specify Name: test-client-roles
- specify Token Claim Name: roles
- Click “Save”
- Open “Client scopes” tab
- Click “Create role”
- specify Role name: User
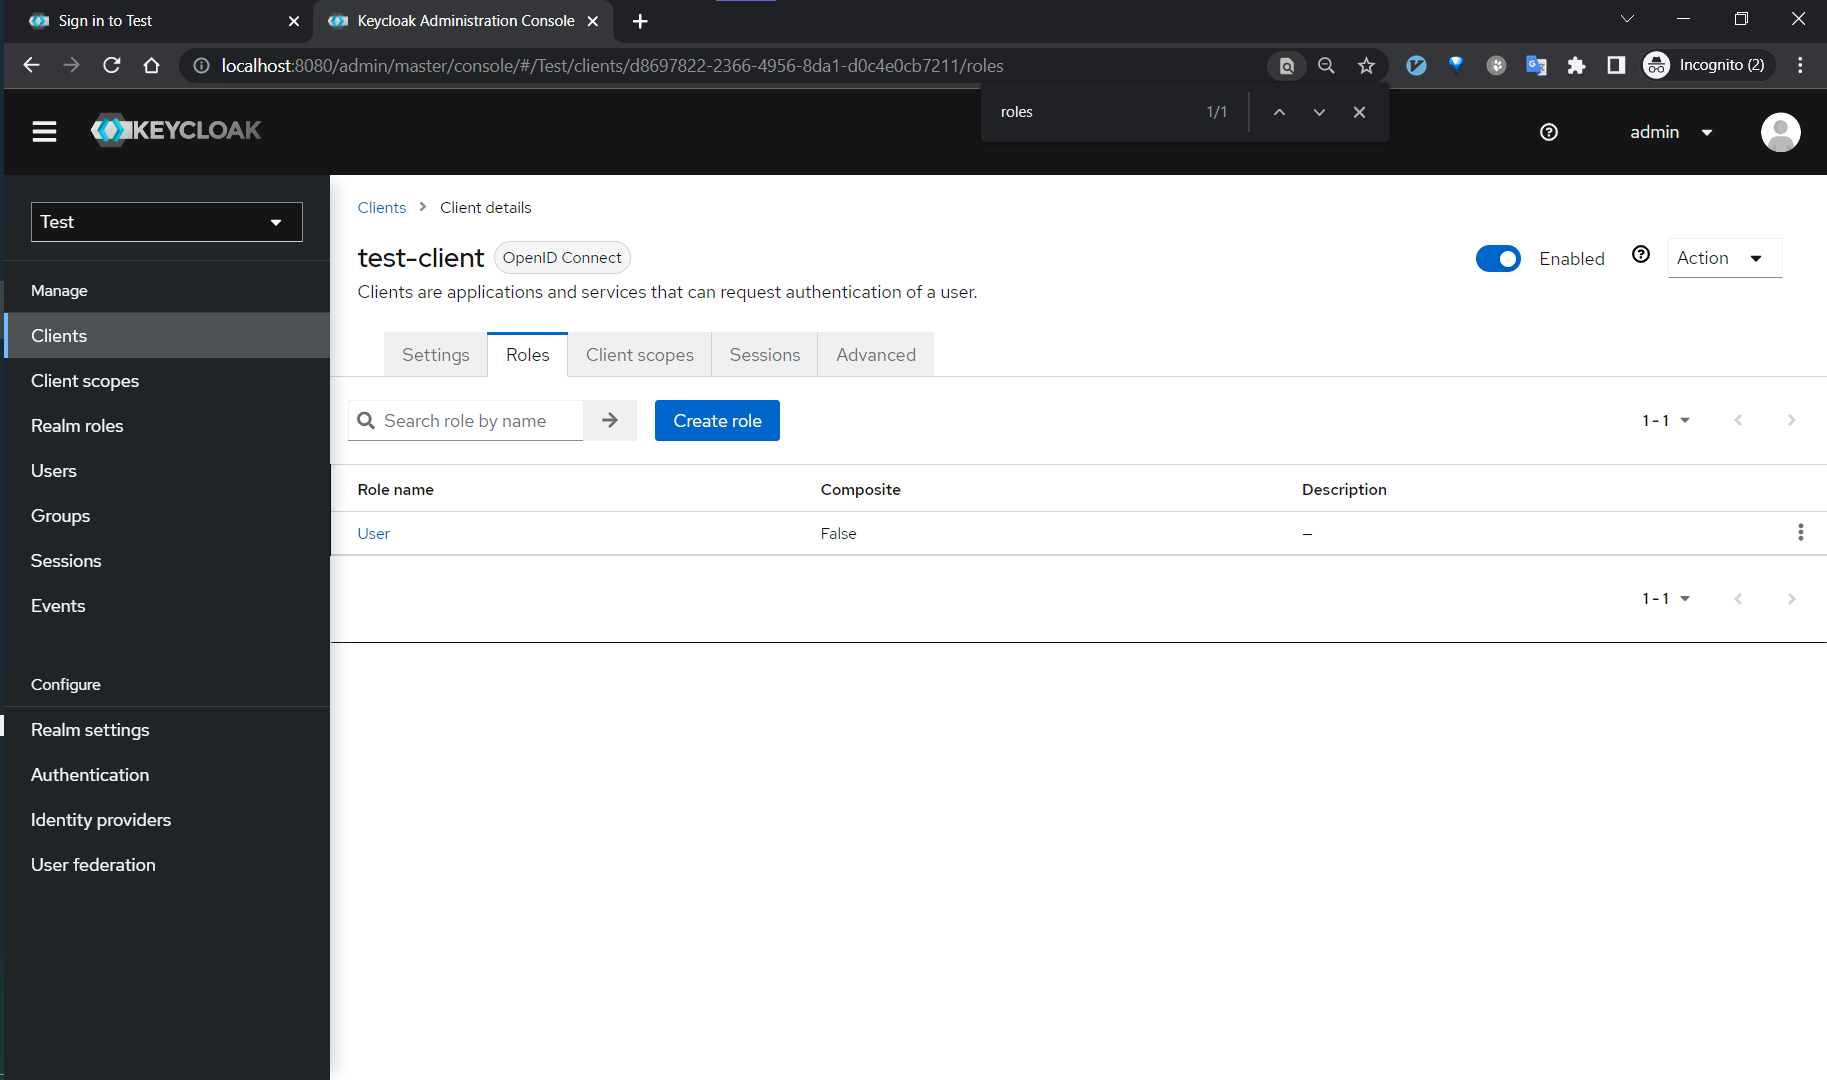
To assign a client role to a user:
- On the left side bar click on “Users” item.
- Select a “user” from the list
- Open “Role mapping” tab
- Click “Assign role”
- Search for “User” and click “Assign”
Here is how a trimmed version of an access token looks like:
{
  "realm_access": {
    "roles": [
      "default-roles-test",
      "offline_access",
      "uma_authorization"
    ]
  },
  "resource_access": {
    "test-client": {
      "roles": [
        "User"
      ]
    },
    "account": {
      "roles": [
        "manage-account",
        "manage-account-links",
        "view-profile"
      ]
    }
  },
  "scope": "openid profile email",
  "sid": "5bec6b83-d4e1-4bb9-84df-4a23292f5247",
  "email_verified": false,
  "roles": [
    "User"
  ],
  "name": "John Doe",
  "preferred_username": "user",
  "given_name": "John",
  "family_name": "Doe",
  "email": "user@nikiforovall.com"
}
Note, the “test-client” roles are duplicated into separate claim that can be used by ASP.NET Identity options.UserOptions.RoleClaim = "roles".
Demo
From “Home” page click “Fetch Data” tab. You will be presented with the next error:
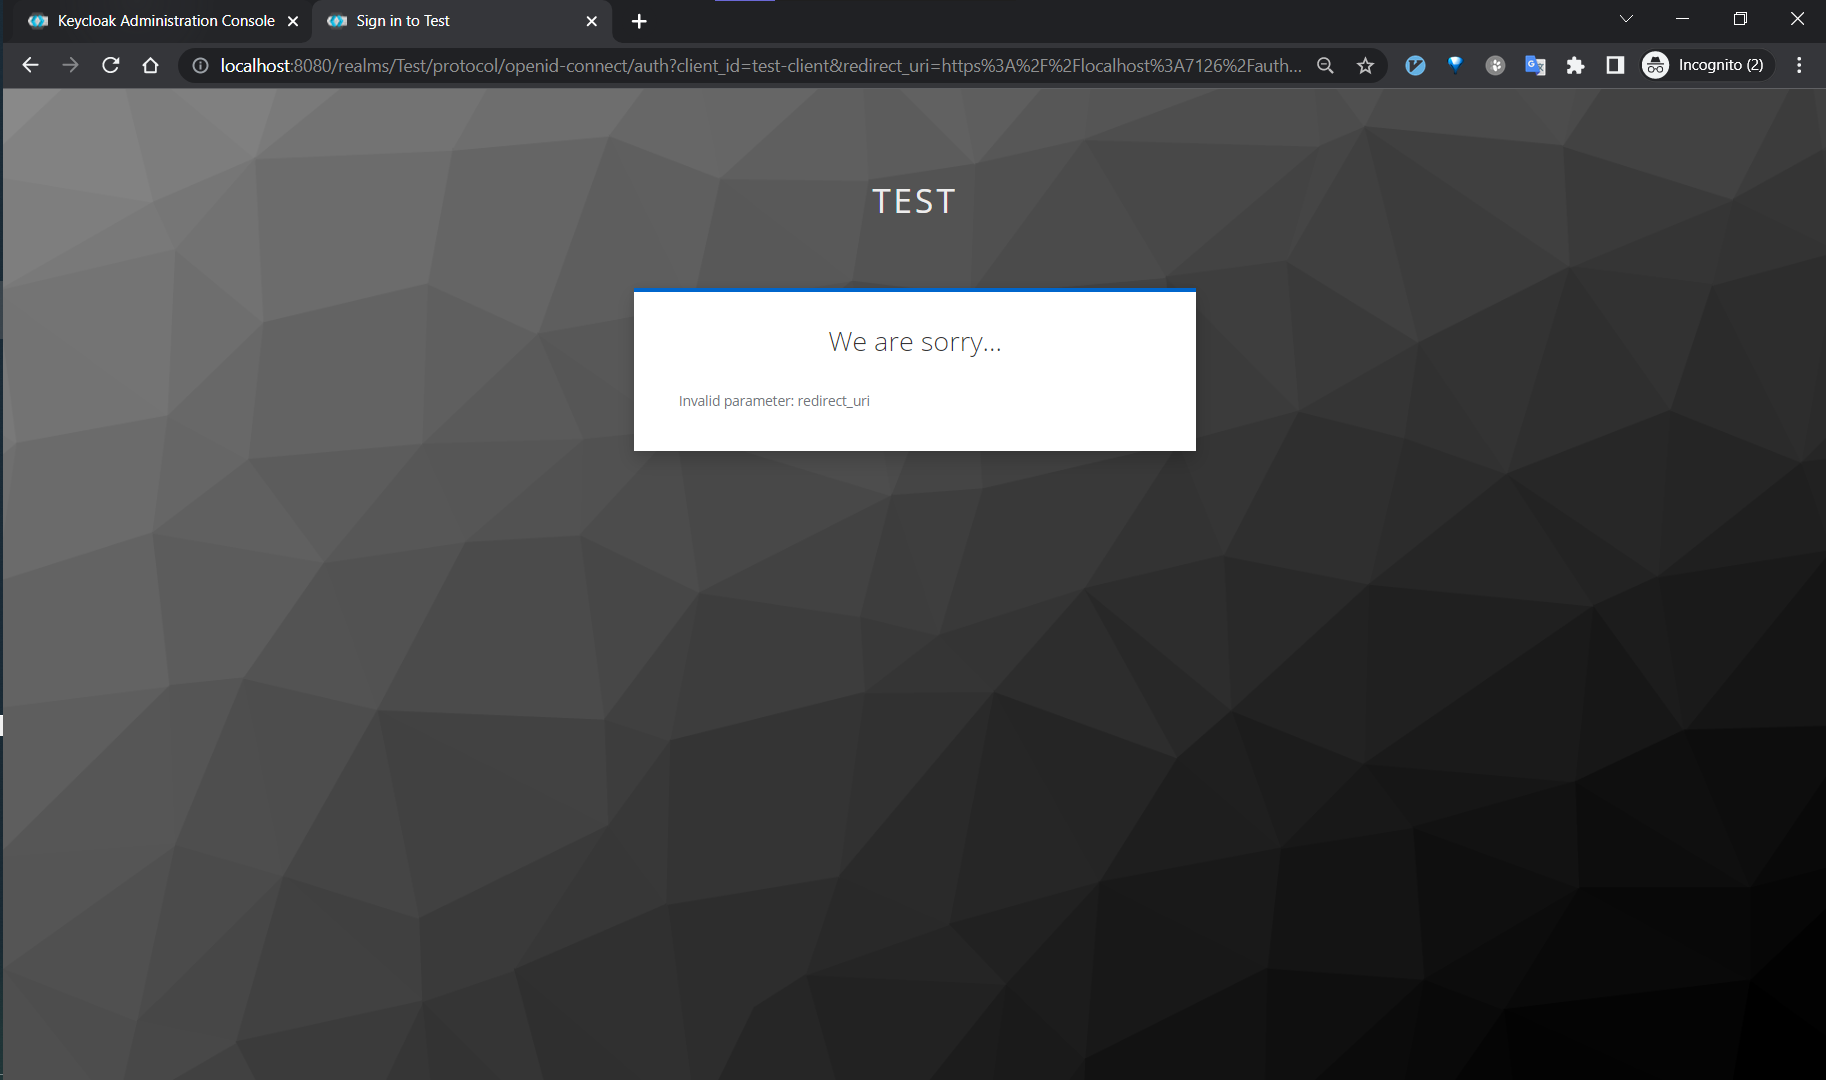
As you might have already guessed, we need to specify Blazor WASM application URL as valid in order for Keycloak to trustfully redirect access tokens to it.
- On the left side bar click on “Clients” item.
- Click “test-client”
- Open “Settings” tab
- Add frontend URL https://localhost:7126/* to “Valid redirect URIs”
- Click “Save”
Now, we you can try again. This time you might see the next expected error:
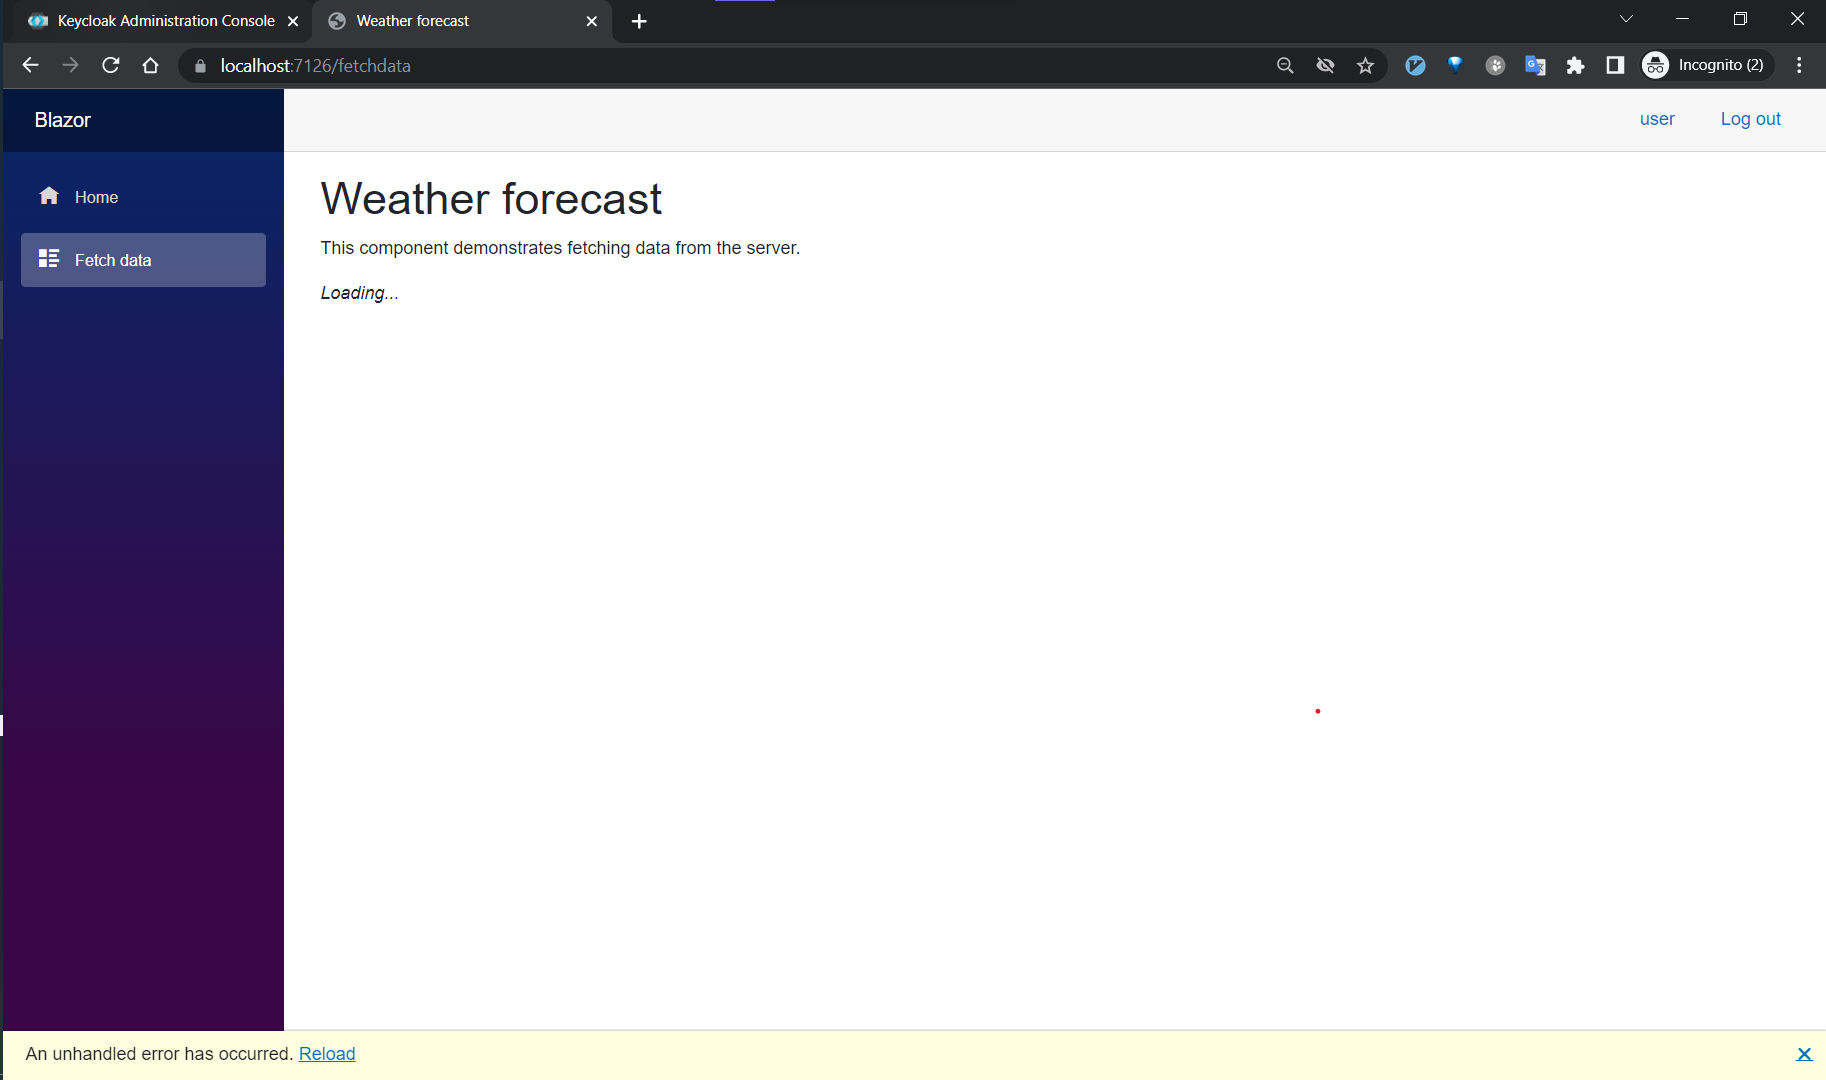
If you check the response from the backend, you will see the status 401 (Unauthorized). The problem is that you need to somehow propagate an access token from the frontend to the backend.
Luckily, it is quite easy to do by using built-in HTTP Client middleware. The code below shows how to add BaseAddressAuthorizationMessageHandler to the default HttpClient used throughout the application.
static void RegisterHttpClient(WebAssemblyHostBuilder builder, IServiceCollection services)
{
    var httpClientName = "Default";
    var baseAddress = new Uri(builder.HostEnvironment.BaseAddress);

    services.AddHttpClient(httpClientName, client => client.BaseAddress = baseAddress)
        .AddHttpMessageHandler<BaseAddressAuthorizationMessageHandler>();

    services.AddScoped(sp => sp.GetRequiredService<IHttpClientFactory>().CreateClient(httpClientName));
}
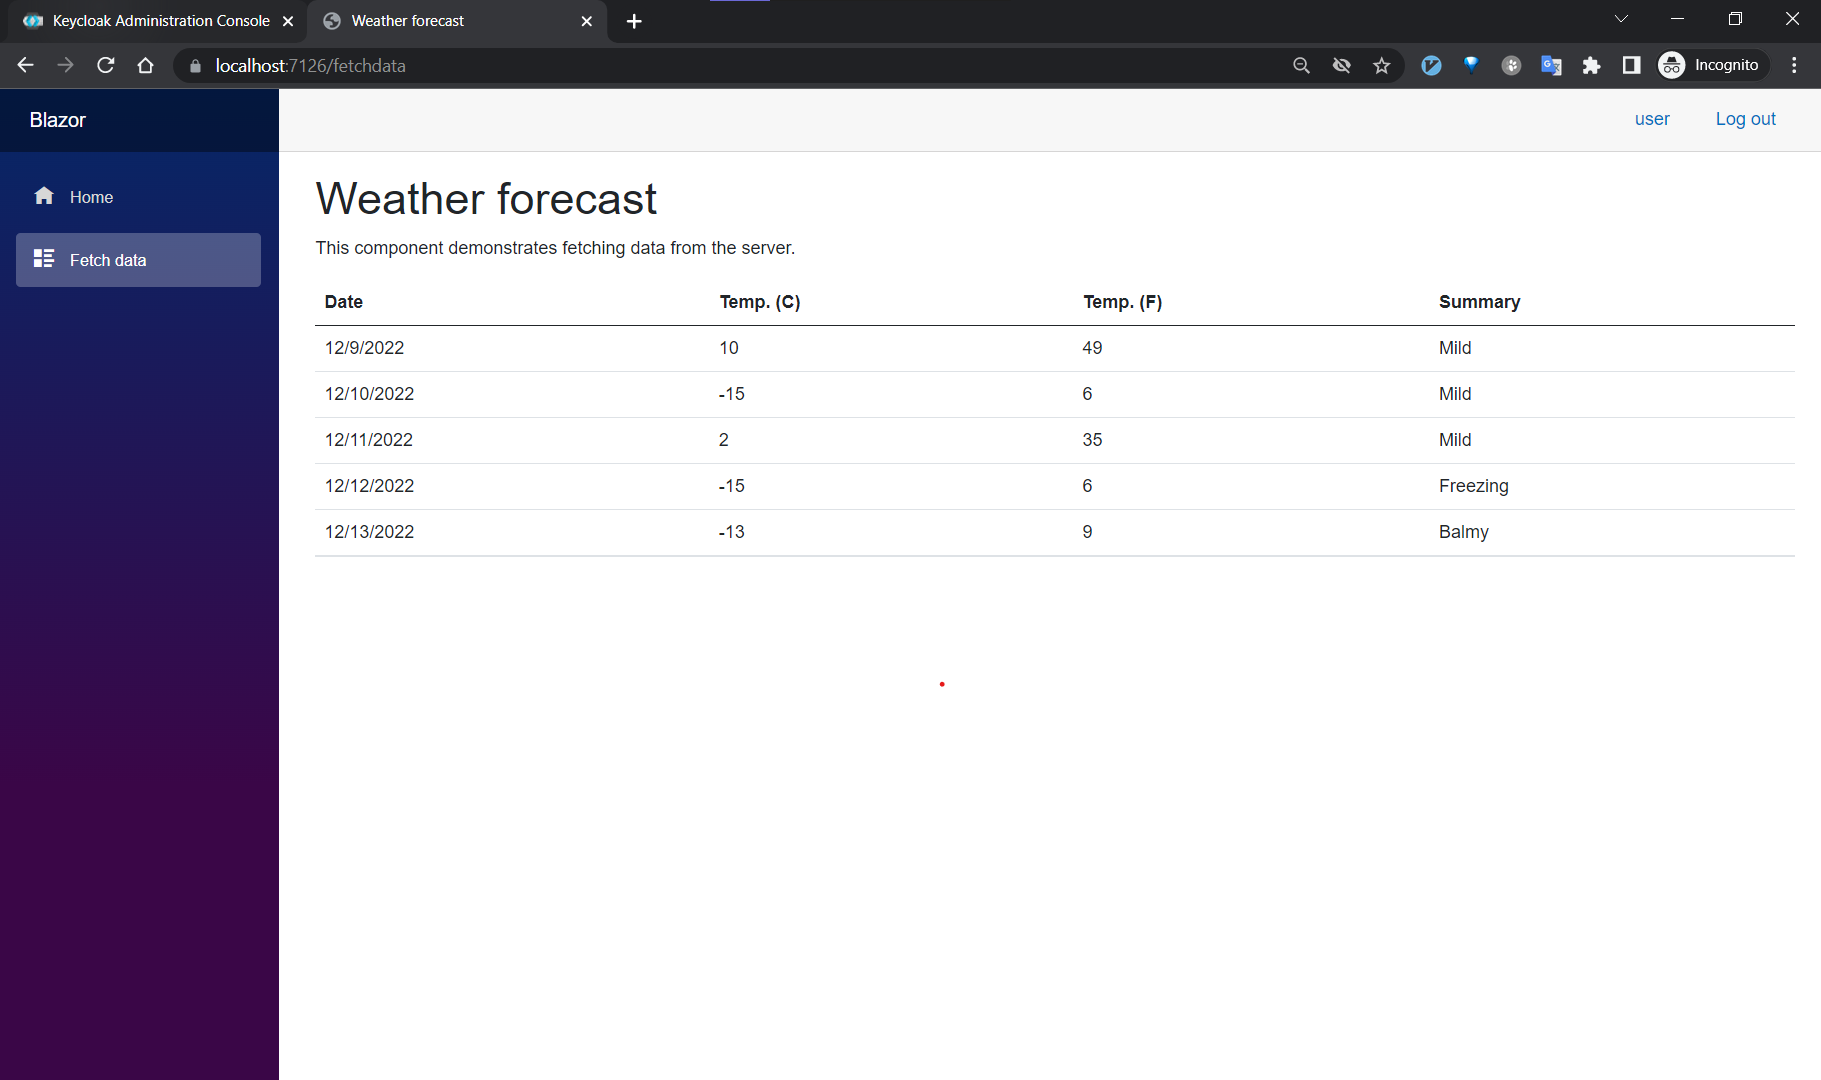
🎉 Hooray. We have successfully integrated Keycloak with Blazor WebAssembly application.
❗ Note, the instructions above are not intended to be a step-by-step guide, please consult the source code for more details.
Reference
- https://www.keycloak.org/docs/latest/securing_apps/index.html
- https://www.keycloak.org/docs/latest/authorization_services/index.html
- https://auth0.com/docs/get-started/authentication-and-authorization-flow
- https://learn.microsoft.com/en-us/azure/active-directory/develop/v2-oauth2-auth-code-flow
- https://learn.microsoft.com/en-us/azure/active-directory/develop/v2-protocols-oidc
- https://www.oauth.com/oauth2-servers/pkce/
- https://learn.microsoft.com/en-us/aspnet/core/blazor/security
- https://learn.microsoft.com/en-us/aspnet/core/blazor/security/webassembly
- https://learn.microsoft.com/en-us/aspnet/core/blazor/security/webassembly/standalone-with-authentication-library
- https://github.com/NikiforovAll/keycloak-authorization-services-dotnet